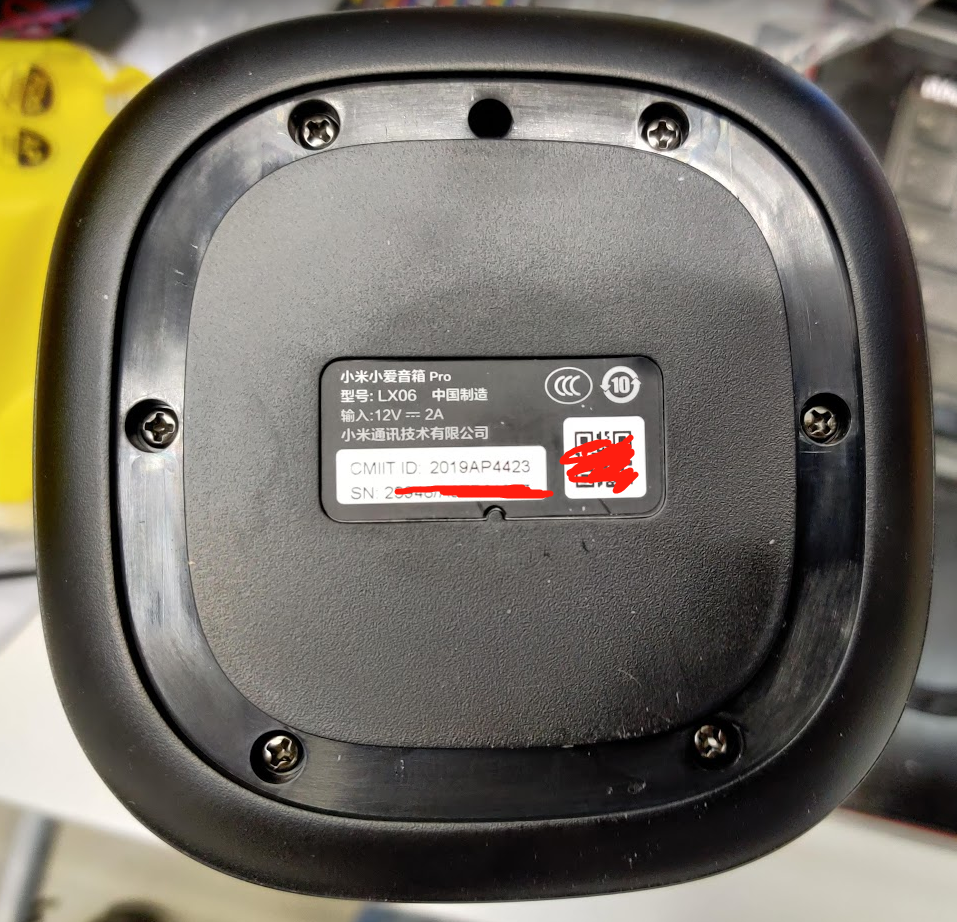
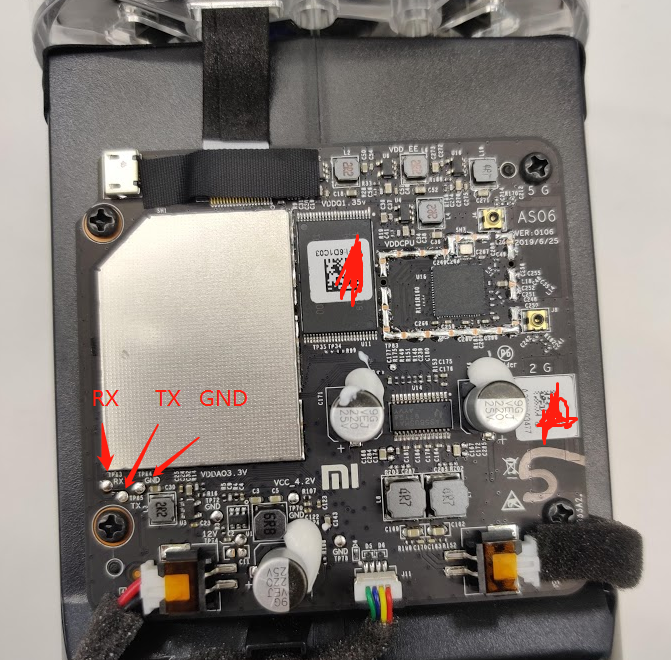
本帖最后由 snowwolf725 于 2021-3-11 15:15 编辑 https://bbs.hassbian.com/forum.p ... tid=8754&pid=283801 https://bbs.hassbian.com/forum.p ... 8754&pid=368909 接上 TTL 接可以查看开机纪录, 未升级前出厂版本 1.52.7 开机登入不需密码,
AXG:BL1:d1dbf2:a4926f;FEAT:E0DC318C:2000;POC:F;EMMC:800;NAND:0;READ:0;0.0;CHK:0;
sdio debug board detected
TE: 23919

BL2 Built : 18:30:39, Aug 28 2018. axg g56303a2-dirty - liang.yang@droid11-sz

set vcck to 1140 mv
set vddee to 1070 mv
Board ID = 1
CPU clk: 1200MHz
DDR low power enabled
DDR3 chl: Rank0 16bit @ 792MHz
bist_test rank: 0 2b 07 50 2e 0a 52 29 03 4f 34 0f 5a 00 00 00 00 00 00 00 00 00 00 00 00 612   - PASS
Rank0: 256MB(auto)-2T-11
AddrBus test pass!
NAND init
page0 page0->bbt:
0000000000000000000000000000000000000000000000000000000000000000
page0 bbt:
0000000000000000000000000000000000000000000000000000000000000000
Load FIP HDR from NAND, src: 0x0000c000, des: 0x01700000, size: 0x00004000
Load BL3x from NAND, src: 0x00010000, des: 0x01704000, size: 0x00080000
NOTICE:  BL31: v1.3(release):a1a8551
NOTICE:  BL31: Built : 15:59:55, Nov  9 2017
NOTICE:  BL31: AXG normal boot!
NOTICE:  BL31: BL33 decompress pass
[Image: axg_v1.1.3268-b93dd79 2017-12-01 14:22:18 huan.biao@droid12]
OPS=0x43
49 ef 5 94 ca 20 c5 2e b9 78 ca 5f bl30:axg ver: 9 mode: 0
bl30:axg thermal0
[0.014483 Inits done]
secure task start!
high task start!
low task start!
ERROR:   Error initializing runtime service opteed_fast


U-Boot 2015.01 (Oct 14 2019 - 03:47:57), Build: jenkins-Mico_lx06_ota_publish-133

DRAM:  256 MiB
Relocation Offset is: 0ef17000
register usb cfg[0][1] = 000000000ff89588
NAND:  nand id: 0x98 0xf1
128MiB, SLC, page size: 2048, OOB size: 64
NAND device id: 98 f1 80 15 f2 16
NAND device: Manufacturer ID: 0x98, Chip ID: 0x98 (Toshiba A revision NAND 1Gib TC58BVG0S3HTA00 )
oob avail size 6
Creating 1 MTD partitions on "A revision NAND 1Gib TC58BVG0S3HTA00 ":
0x000000000000-0x000000200000 : "bootloader"
A revision NAND 1Gib TC58BVG0S3HTA00  initialized ok
nand id: 0x98 0xf1
128MiB, SLC, page size: 2048, OOB size: 64
NAND device id: 98 f1 80 15 f2 16
NAND device: Manufacturer ID: 0x98, Chip ID: 0x98 (Toshiba A revision NAND 1Gib TC58BVG0S3HTA00 )
PLANE change!
aml_nand_init :oobmul=1,oobfree.length=8,oob_size=64
oob avail size 8
bbt_start=20 env_start=24 key_start=32 dtb_start=40
nbbt: info size=0x400 max_scan_blk=24, start_blk=20
nbbt : phy_blk_addr=20, ec=0, phy_page_addr=0, timestamp=1
nbbt free list:
blockN=21, ec=-1, dirty_flag=0
blockN=22, ec=-1, dirty_flag=0
blockN=23, ec=-1, dirty_flag=0
aml_nand_scan_rsv_info 1251: page_num=1
aml_nand_scan_rsv_info 1254
nbbt valid addr: 280000
aml_nand_bbt_check 1389 bbt is valid, reading.
aml_nand_read_rsv_info:397,read nbbt info to 280000
nenv: info size=0x10000 max_scan_blk=32, start_blk=24
nenv : phy_blk_addr=24, ec=19, phy_page_addr=0, timestamp=39
nenv free list:
blockN=25, ec=18, dirty_flag=1
blockN=26, ec=-1, dirty_flag=0
blockN=27, ec=-1, dirty_flag=0
blockN=28, ec=-1, dirty_flag=0
blockN=29, ec=-1, dirty_flag=0
blockN=30, ec=-1, dirty_flag=0
blockN=31, ec=-1, dirty_flag=0
aml_nand_scan_rsv_info 1251: page_num=32
aml_nand_scan_rsv_info 1254
nenv valid addr: 300000
nkey: info size=0x8000 max_scan_blk=40, start_blk=32
nkey : phy_blk_addr=32, ec=0, phy_page_addr=0, timestamp=1
nkey free list:
blockN=33, ec=-1, dirty_flag=0
blockN=34, ec=-1, dirty_flag=0
blockN=35, ec=-1, dirty_flag=0
blockN=36, ec=-1, dirty_flag=0
blockN=37, ec=-1, dirty_flag=0
blockN=38, ec=-1, dirty_flag=0
blockN=39, ec=-1, dirty_flag=0
aml_nand_scan_rsv_info 1251: page_num=16
aml_nand_scan_rsv_info 1254
nkey valid addr: 418000
ndtb: info size=0x20000 max_scan_blk=44, start_blk=40
ndtb : phy_blk_addr=40, ec=0, phy_page_addr=0, timestamp=1
ndtb free list:
blockN=41, ec=-1, dirty_flag=0
blockN=42, ec=-1, dirty_flag=0
blockN=43, ec=-1, dirty_flag=0
aml_nand_scan_rsv_info 1251: page_num=64
aml_nand_scan_rsv_info 1254
ndtb valid addr: 500000
tpl: off 8388608, size 8388608
 NAND bbt detect factory Bad block at 6000000
aml_nand_add_partition:1794 factory bad addr=300
Creating 6 MTD partitions on "A revision NAND 1Gib TC58BVG0S3HTA00 ":
0x000000800000-0x000001000000 : "tpl"
0x000001000000-0x000001600000 : "boot0"
0x000001600000-0x000001c00000 : "boot1"
0x000001c00000-0x000004400000 : "system0"
0x000004400000-0x000006c20000 : "system1"
 NAND bbt detect factory Bad block at 6000000
0x000006c20000-0x000008000000 : "data"
A revision NAND 1Gib TC58BVG0S3HTA00  initialized ok
aml_key_init 170
MMC:
uboot env amlnf_env_read : ####
aml_nand_read_rsv_info:397,read nenv info to 300000
In:    serial
Out:   serial
Err:   serial
[store]To run cmd[amlnf dtb_read 0x1000000 0x20000]
sub cmd dtb
new argv[1] dtb_read
do_dtb_ops(): argc 4
arg 0: amlnf
arg 1: dtb_read
arg 2: 0x1000000
arg 3: 0x20000
do_dtb_ops() read
amlnf_dtb_read: ####
aml_nand_read_rsv_info:397,read ndtb info to 500000
do_dtb_ops(): 131072 bytes read : OK
      Amlogic multi-dtb tool
      Single dtb detected
amlkey_init() enter!
amlnf_key_read key data len too much
aml_nand_read_rsv_info:397,read nkey info to 418000
[EFUSE_MSG]keynum is 4
Hit Enter or space or Ctrl+C key to stop autoboot -- :  0
Saving Environment to aml-storage...
uboot env amlnf_env_save : ####
aml_nand_save_rsv_info:656, nenv: valid=1, pages=32
aml_nand_save_rsv_info:716,save info to 310000
aml_nand_write_rsv:520,write info to 310000
save_power_post ...
## Booting Android Image at 0x01080000 ...
reloc_addr =f0344e0
copy done
load dtb from 0x1000000 ......
      Amlogic multi-dtb tool
      Single dtb detected
   Uncompressing Kernel Image ... OK
   kernel loaded at 0x01080000, end = 0x0185c808
   Loading Ramdisk to 0eea8000, end 0f005332 ... OK
   Loading Device Tree to 000000000ee9c000, end 000000000eea7036 ... OK

Starting kernel ...

uboot time: 1546948 us
domain-0 init dvfs: 4
[    0.290790@1] ff803000.serial: clock gate not found
[    0.298189@1] amlogic-new-usb3 ffe09080.usb3phy: This phy has no usb port
[    1.196193@1] hub 2-0:1.0: config failed, hub doesn't have any ports! (err -19)
LED AW20054
LX06
curr_boot is boot0
Booting from boot0
/dev/mtdblock4 is ready now.
[    2.588301@0] meson-pinctrl pinctrl@ff634480: function 'gpioa_20' not supported
[    2.590102@0] meson-pinctrl pinctrl@ff634480: invalid function gpioa_20 in map table
Press the [f] key and hit [enter] to enter failsafe mode
Press the [1], [2], [3] or [4] key and hit [enter] to select the debug level
Please press Enter to activate this console.
[    9.867249@2] name: mac_wifi, size 17
[    9.884224@3] name: mac_bt, size 17
ledserver[1246]: current model lx06.

ledserver[1246]: LEDSBAK EXISITS

crond[1283]: crond (busybox 1.27.2) started, log level 5

[   12.673565@1] wlan: Loading MWLAN driver
[   12.674501@1] vendor=0x02DF device=0x9145 class=0 function=1
[   12.677592@1] SDIO: max_segs=1024 max_seg_size=131072
[   12.682519@1] rx_work=1 cpu_num=4
[   12.689843@2] Request firmware: mrvl/sdsd8977_combo_v2.bin
[   14.988585@1] WLAN FW is active
[   15.103121@1] get_channel when STA is not connected
[   15.105345@1] get_channel when AP is not started
[   15.108381@0] wlan: version = SD8977-16.84.9.p6-C4X16C544.P3-GPL-(FP84)
[   15.114713@0] wlan: Driver loaded successfully
[   15.544367@3] BT: Loading driver
[   15.546108@1] BT FW is active(0)
[   15.546148@1] BT: FW already downloaded!
[   15.555877@2] get_channel when STA is not connected
[   15.556503@2] get_channel when STA is not connected
[   15.561417@2] get_channel when STA is not connected
[   15.565363@2] get_channel when STA is not connected
[   15.570813@3] get_channel when STA is not connected
[   15.571440@2] BT: Driver loaded successfully
[   15.733067@2] wlan: wlan0 START SCAN


BusyBox v1.27.2 () built-in shell (ash)

  _____  _              __     __ __  ___  ___
 |     ||_| ___  ___   |  |   |  |  ||   ||  _|
 | | | || ||  _|| . |  |  |__ |-   -|| | || . |
 |_|_|_||_||___||___|  |_____||__|__||___||___|
------------------------------------------------

      ROM Type:release / Ver:1.52.7
------------------------------------------------
=== WARNING! =====================================
There is no root password defined on this device!
Use the "passwd" command to set up a new password
in order to prevent unauthorized SSH logins.
--------------------------------------------------
root@mico:/#
复制代码
升级到最新版 1.58.13 预设 TTL 登入需要密码 https://bbs.hassbian.com/thread-8667-1-1.html 参考这篇的方式自己算出密码可以透过 TTL 登入,
AXG:BL1:d1dbf2:a4926f;FEAT:E0DC318C:2000;POC:F;EMMC:800;NAND:0;READ:0;0.0;CHK:0;
sdio debug board detected
TE: 24140

BL2 Built : 18:30:39, Aug 28 2018. axg g56303a2-dirty - liang.yang@droid11-sz

set vcck to 1140 mv
set vddee to 1070 mv
Board ID = 1
CPU clk: 1200MHz
DDR low power enabled
DDR3 chl: Rank0 16bit @ 792MHz
bist_test rank: 0 2d 08 52 2f 0a 54 28 02 4f 35 0f 5b 00 00 00 00 00 00 00 00 00 00 00 00 607   - PASS
Rank0: 256MB(auto)-2T-11
AddrBus test pass!
NAND init
page0 page0->bbt:
0000000000000000000000000000000000000000000000000000000000000000
page0 bbt:
0000000000000000000000000000000000000000000000000000000000000000
Load FIP HDR from NAND, src: 0x0000c000, des: 0x01700000, size: 0x00004000
Load BL3x from NAND, src: 0x00010000, des: 0x01704000, size: 0x00080000
NOTICE:  BL31: v1.3(release):a1a8551
NOTICE:  BL31: Built : 15:59:55, Nov  9 2017
NOTICE:  BL31: AXG normal boot!
NOTICE:  BL31: BL33 decompress pass
[Image: axg_v1.1.3268-b93dd79 2017-12-01 14:22:18 huan.biao@droid12]
OPS=0x43
49 ef 5 94 ca 20 c5 2e b9 78 ca 5f bl30:axg ver: 9 mode: 0
bl30:axg thermal0
[0.014521 Inits done]
secure task start!
high task start!
low task start!
ERROR:   Error initializing runtime service opteed_fast


U-Boot 2015.01 (Oct 14 2019 - 03:47:57), Build: jenkins-Mico_lx06_ota_publish-133

DRAM:  256 MiB
Relocation Offset is: 0ef17000
register usb cfg[0][1] = 000000000ff89588
NAND:  nand id: 0x98 0xf1
128MiB, SLC, page size: 2048, OOB size: 64
NAND device id: 98 f1 80 15 f2 16
NAND device: Manufacturer ID: 0x98, Chip ID: 0x98 (Toshiba A revision NAND 1Gib TC58BVG0S3HTA00 )
oob avail size 6
Creating 1 MTD partitions on "A revision NAND 1Gib TC58BVG0S3HTA00 ":
0x000000000000-0x000000200000 : "bootloader"
A revision NAND 1Gib TC58BVG0S3HTA00  initialized ok
nand id: 0x98 0xf1
128MiB, SLC, page size: 2048, OOB size: 64
NAND device id: 98 f1 80 15 f2 16
NAND device: Manufacturer ID: 0x98, Chip ID: 0x98 (Toshiba A revision NAND 1Gib TC58BVG0S3HTA00 )
PLANE change!
aml_nand_init :oobmul=1,oobfree.length=8,oob_size=64
oob avail size 8
bbt_start=20 env_start=24 key_start=32 dtb_start=40
nbbt: info size=0x400 max_scan_blk=24, start_blk=20
nbbt : phy_blk_addr=20, ec=0, phy_page_addr=0, timestamp=1
nbbt free list:
blockN=21, ec=-1, dirty_flag=0
blockN=22, ec=-1, dirty_flag=0
blockN=23, ec=-1, dirty_flag=0
aml_nand_scan_rsv_info 1251: page_num=1
aml_nand_scan_rsv_info 1254
nbbt valid addr: 280000
aml_nand_bbt_check 1389 bbt is valid, reading.
aml_nand_read_rsv_info:397,read nbbt info to 280000
nenv: info size=0x10000 max_scan_blk=32, start_blk=24
nenv : phy_blk_addr=24, ec=9, phy_page_addr=0, timestamp=19
nenv free list:
blockN=25, ec=8, dirty_flag=1
blockN=26, ec=-1, dirty_flag=0
blockN=27, ec=-1, dirty_flag=0
blockN=28, ec=-1, dirty_flag=0
blockN=29, ec=-1, dirty_flag=0
blockN=30, ec=-1, dirty_flag=0
blockN=31, ec=-1, dirty_flag=0
aml_nand_scan_rsv_info 1251: page_num=32
aml_nand_scan_rsv_info 1254
nenv valid addr: 300000
nkey: info size=0x8000 max_scan_blk=40, start_blk=32
nkey : phy_blk_addr=32, ec=0, phy_page_addr=0, timestamp=1
nkey free list:
blockN=33, ec=-1, dirty_flag=0
blockN=34, ec=-1, dirty_flag=0
blockN=35, ec=-1, dirty_flag=0
blockN=36, ec=-1, dirty_flag=0
blockN=37, ec=-1, dirty_flag=0
blockN=38, ec=-1, dirty_flag=0
blockN=39, ec=-1, dirty_flag=0
aml_nand_scan_rsv_info 1251: page_num=16
aml_nand_scan_rsv_info 1254
nkey valid addr: 418000
ndtb: info size=0x20000 max_scan_blk=44, start_blk=40
ndtb : phy_blk_addr=40, ec=0, phy_page_addr=0, timestamp=1
ndtb free list:
blockN=41, ec=-1, dirty_flag=0
blockN=42, ec=-1, dirty_flag=0
blockN=43, ec=-1, dirty_flag=0
aml_nand_scan_rsv_info 1251: page_num=64
aml_nand_scan_rsv_info 1254
ndtb valid addr: 500000
tpl: off 8388608, size 8388608
 NAND bbt detect factory Bad block at 6000000
aml_nand_add_partition:1794 factory bad addr=300
Creating 6 MTD partitions on "A revision NAND 1Gib TC58BVG0S3HTA00 ":
0x000000800000-0x000001000000 : "tpl"
0x000001000000-0x000001600000 : "boot0"
0x000001600000-0x000001c00000 : "boot1"
0x000001c00000-0x000004400000 : "system0"
0x000004400000-0x000006c20000 : "system1"
 NAND bbt detect factory Bad block at 6000000
0x000006c20000-0x000008000000 : "data"
A revision NAND 1Gib TC58BVG0S3HTA00  initialized ok
aml_key_init 170
MMC:
uboot env amlnf_env_read : ####
aml_nand_read_rsv_info:397,read nenv info to 300000
In:    serial
Out:   serial
Err:   serial
[store]To run cmd[amlnf dtb_read 0x1000000 0x20000]
sub cmd dtb
new argv[1] dtb_read
do_dtb_ops(): argc 4
arg 0: amlnf
arg 1: dtb_read
arg 2: 0x1000000
arg 3: 0x20000
do_dtb_ops() read
amlnf_dtb_read: ####
aml_nand_read_rsv_info:397,read ndtb info to 500000
do_dtb_ops(): 131072 bytes read : OK
      Amlogic multi-dtb tool
      Single dtb detected
amlkey_init() enter!
amlnf_key_read key data len too much
aml_nand_read_rsv_info:397,read nkey info to 418000
[EFUSE_MSG]keynum is 4
InUsbBurn
noSof
Hit Enter or space or Ctrl+C key to stop autoboot -- :  0
HAVE SN Code ...
Saving Environment to aml-storage...
uboot env amlnf_env_save : ####
aml_nand_save_rsv_info:656, nenv: valid=1, pages=32
aml_nand_save_rsv_info:716,save info to 310000
aml_nand_write_rsv:520,write info to 310000
[burnup]Rd:Up sz 0x3f2037 to align 0x1000
save_power_post ...
## Booting Android Image at 0x01080000 ...
reloc_addr =f0344e0
copy done
load dtb from 0x1000000 ......
      Amlogic multi-dtb tool
      Single dtb detected
   Uncompressing Kernel Image ... OK
   kernel loaded at 0x01080000, end = 0x0185c808
   Loading Ramdisk to 0eea8000, end 0f0054ae ... OK
   Loading Device Tree to 000000000ee9c000, end 000000000eea7036 ... OK

Starting kernel ...

uboot time: 1804637 us
domain-0 init dvfs: 4
[    0.295052@3] ff803000.serial: clock gate not found
[    0.302417@3] amlogic-new-usb3 ffe09080.usb3phy: This phy has no usb port
[    1.200534@0] hub 2-0:1.0: config failed, hub doesn't have any ports! (err -19)
LED AW20054
LX06
curr_boot is boot1
Booting from boot1
/dev/mtdblock5 is ready now.
[    2.585896@0] meson-pinctrl pinctrl@ff634480: function 'gpioa_20' not supported
[    2.587582@0] meson-pinctrl pinctrl@ff634480: invalid function gpioa_20 in map table
Press the [f] key and hit [enter] to enter failsafe mode
Press the [1], [2], [3] or [4] key and hit [enter] to select the debug level
Please press Enter to activate this console.
[    9.802532@2] name: mac_wifi, size 17
[    9.817822@0] name: mac_bt, size 17
ledserver[1245]: current model lx06.

ledserver[1245]: LEDSBAK EXISITS

crond[1283]: crond (busybox 1.27.2) started, log level 5

[   12.661449@1] wlan: Loading MWLAN driver
[   12.662130@0] vendor=0x02DF device=0x9145 class=0 function=1
[   12.665492@0] SDIO: max_segs=1024 max_seg_size=131072
[   12.670397@0] rx_work=1 cpu_num=4
[   12.677638@0] Request firmware: mrvl/sdsd8977_combo_v2.bin
[   14.968238@3] WLAN FW is active
[   15.075150@0] get_channel when STA is not connected
[   15.077559@2] get_channel when AP is not started
[   15.080443@2] wlan: version = SD8977-16.84.9.p17-C4X16C544.P3-GPL-(FP84)
[   15.086106@2] wlan: Driver loaded successfully
[   15.501524@1] BT: Loading driver
[   15.505919@2] BT FW is active(0)
[   15.505956@2] BT: FW already downloaded!
[   15.519064@0] get_channel when STA is not connected
[   15.519646@0] get_channel when STA is not connected
[   15.520630@3] BT: Driver loaded successfully
[   15.528828@0] get_channel when STA is not connected
[   15.532770@0] get_channel when STA is not connected
[   15.538312@1] get_channel when STA is not connected
[   15.668846@1] wlan: wlan0 START SCAN
复制代码
Press the [f] key and hit [enter] to enter failsafe mode
Press the [1], [2], [3] or [4] key and hit [enter] to select the debug level
- failsafe -
Generating key, this may take a while...
Public key portion is:
ssh-rsa AAAAB3NzaC1yc2EAAAADAQABAAAAgQC2DP92+nA0hs7KMFsuE+LlcrLcazqb84TWYuPC7u/2                                                                                                                                                             yqzxcLhIXXJTVYo1hdvtJ7XSYLdZ3FhtQqj9Ab1ofCgaNPp+VyDxx9Hc9+UpLqUpL++FyjaoEFWQMCse                                                                                                                                                             3PXhohKjqxSF+zJkKjG0Cd9jM7Vz+T/snAf7zYNYApu0h9LbdQ== root@(none)
Fingerprint: md5 e0:4f:5b:63:cc:4a:10:73:49:6a:76:97:f1:be:46:58
f

BusyBox v1.27.2 () built-in shell (ash)

ash: can't access tty; job control turned off
  _____  _              __     __ __  ___  ___
 |     ||_| ___  ___   |  |   |  |  ||   ||  _|
 | | | || ||  _|| . |  |  |__ |-   -|| | || . |
 |_|_|_||_||___||___|  |_____||__|__||___||___|
------------------------------------------------

      ROM Type:release / Ver:1.58.13
------------------------------------------------
================= FAILSAFE MODE active ================
special commands:
* firstboot          reset settings to factory defaults
* mount_root     mount root-partition with config files

after mount_root:
* passwd                         change root's password
* /etc/config               directory with config files

for more help see:
http://wiki.openwrt.org/doc/howto/generic.failsafe
=======================================================


root@(none):/etc# cat shadow
root:$1$N0Iz0LLs$kZ5zG/Y2AUWHNE5I3ElWm1:18128:0:99999:7:::
daemon:*:0:0:99999:7:::
ftp:*:0:0:99999:7:::
network:*:0:0:99999:7:::
nobody:*:0:0:99999:7:::
mosquitto:x:0:0:99999:7:::
root@(none):/etc# cat passwd
root:x:0:0:root:/root:/bin/ash
daemon:*:1:1:daemon:/var:/bin/false
ftp:*:55:55:ftp:/home/ftp:/bin/false
network:*:101:101:network:/var:/bin/false
nobody:*:65534:65534:nobody:/var:/bin/false
mosquitto:x:200:200:mosquitto:/var/run/mosquitto:/bin/false
复制代码
reboot 讯息
root@mico:/data# reboot
root@mico:/data# bluez_mibt_ble_new[2809]: main:

bluez_mibt_ble shutting down...


mediaplayer[1814]: sigterm_handler, somebody killed me, exit!

miio_bt[352]: sig_handler:15
rssi[1890]: failed to reconnect, trying again in 2 seconds
miio_bt[352]: [E][arch_rpc] rpc_agent_ot_message_callback 302: socket

miio_service[3093]: failed to reconnect, trying again in 2 seconds

bluez_mibt_classical[2807]: ------ proxy_removed, 376 ------


bluez_mibt_classical[2807]: Agent unregistered


bluez_mibt_classical[2807]: ------ proxy_removed, 376 ------


bluez_mibt_classical[2807]: ------ proxy_removed, 376 ------


bluez_mibt_classical[2807]: [DEL] Controller EC:41:18:6D: 撠镨阅?喟拳-1807 [default]


bluez_mibt_classical[2807]: ------ proxy_removed, 376 ------


bluez_mibt_classical[2807]: ------ proxy_removed, 376 ------


bluez_mibt_classical[2807]: !!!! disconnect disconnect_handler !!

miio_bt[352]: byebye
bl31 reboot reason: 0xd
bl31 reboot reason: 0x1
system cmd  1.
复制代码
查看全部评分

 发表于 2019-11-29 14:33:54