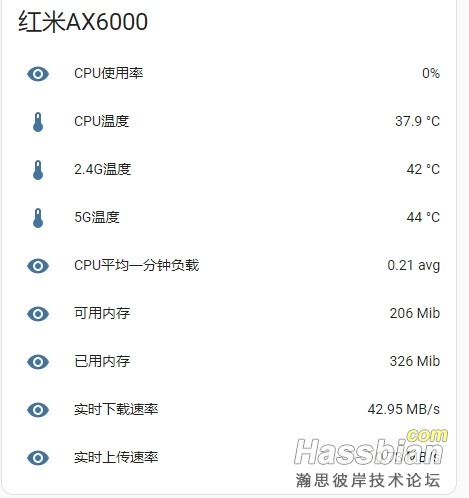
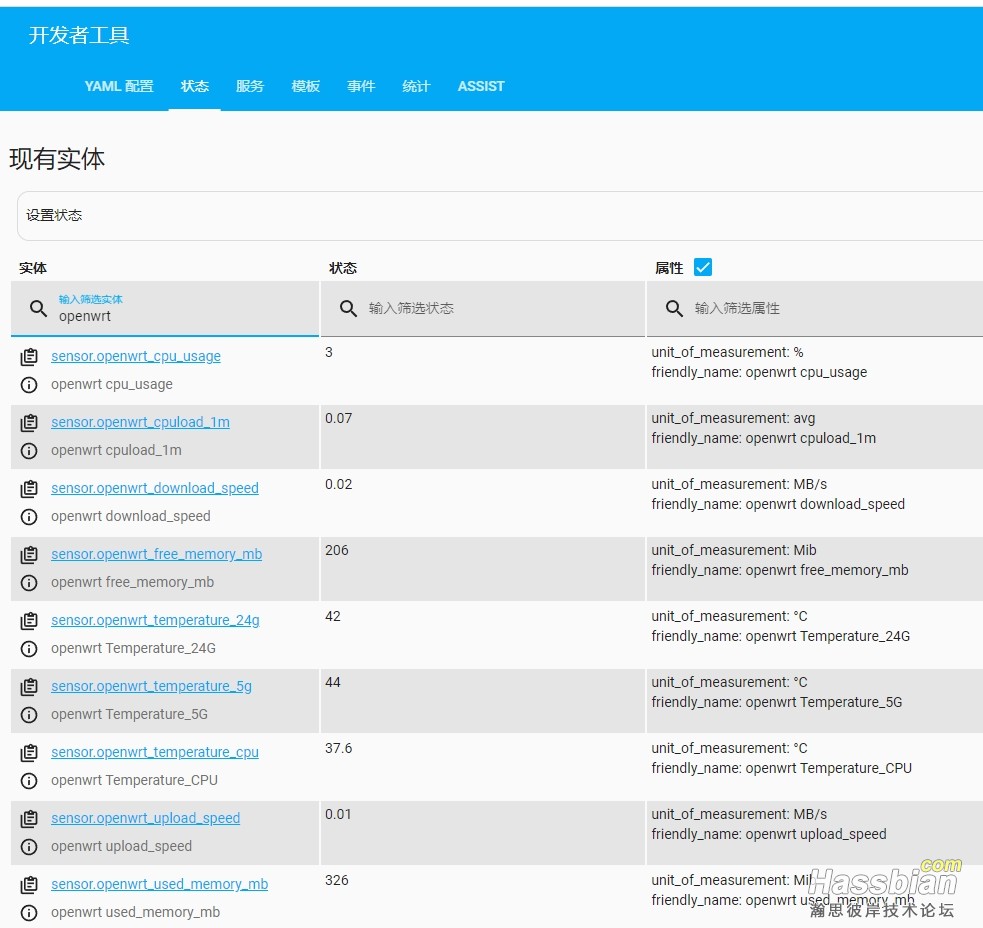
本帖最后由 farmers 于 2023-11-3 19:55 编辑

https://bbs.hassbian.com/thread-20249-1-1.html
根据此贴修改而来。
注意,此教程仅适合刷机过后的的红米ax6000。
1.新建一个名为 test.sh的文件 代码如下 保存用winscp登录红米路由 上传到/root文件夹下 记得赋予777权限
#!/bin/sh

# Define the network interface name
interface="eth1"

# Get the byte counts at the beginning
rx_start=$(ifconfig $interface | grep "RX bytes" | awk '{print $2}' | cut -d : -f 2)
tx_start=$(ifconfig $interface | grep "TX bytes" | awk '{print $6}' | cut -d : -f 2)

# Sleep for a short interval to capture data
sleep 5

# Get the byte counts at the end
rx_end=$(ifconfig $interface | grep "RX bytes" | awk '{print $2}' | cut -d : -f 2)
tx_end=$(ifconfig $interface | grep "TX bytes" | awk '{print $6}' | cut -d : -f 2)

# Calculate the bytes transferred during the interval
rx_bytes=$((rx_end - rx_start))
tx_bytes=$((tx_end - tx_start))

# Calculate the elapsed time (in this case, 5 seconds)
elapsed_time=5

# Calculate the download and upload speeds in MB/s with two decimal places
rx_speed=$(awk -v rx_bytes="$rx_bytes" -v elapsed_time="$elapsed_time" 'BEGIN { printf "%.2f", (rx_bytes / 1024 / 1024 / elapsed_time) }')
tx_speed=$(awk -v tx_bytes="$tx_bytes" -v elapsed_time="$elapsed_time" 'BEGIN { printf "%.2f", (tx_bytes / 1024 / 1024 / elapsed_time) }')

# Additional parameters
temp_cpu=$(cat /sys/devices/virtual/thermal/thermal_zone0/temp | awk '{printf "%.1f", $1/1000}')
temp_24g=$(iwpriv ra0 stat | grep CurrentTemperature | sed -e 's/[^0-9]//g' | tr -d "\n")
temp_5g=$(iwpriv rai0 stat | grep CurrentTemperature | sed -e 's/[^0-9]//g' | tr -d "\n")
cpuload_1m=$(cat /proc/loadavg | awk '{print $1}' | sed 's/,//')
cpu_usage=$(top -bn1 | awk '/^CPU/ {print 100 - $8}')

top_output=$(top -bn1)
used_memory_kb=$(echo "$top_output" | awk '/Mem:/ {print $2}' | sed 's/K//')
used_memory_mb=$(awk "BEGIN {printf "%.0f", $used_memory_kb / 1024}")

free=$(echo "$top_output" | awk '/Mem:/ {print $4}' | sed 's/K//')
shrd=$(echo "$top_output" | awk '/Mem:/ {print $6}' | sed 's/K//')
cached=$(echo "$top_output" | awk '/Mem:/ {print $10}' | sed 's/K//')

free_memory_mb=$(( (free + shrd + cached) / 1024 ))

# Construct the JSON data to send to the Webhook
post_data="{"temp_cpu":$temp_cpu, "temp_24g":$temp_24g, "temp_5g":$temp_5g, "cpuload_1m":$cpuload_1m, "cpu_usage":$cpu_usage, "free_memory_mb":$free_memory_mb, "used_memory_mb":$used_memory_mb, "download_speed":$rx_speed, "upload_speed":$tx_speed}"

# Send the JSON data to the Webhook URL
curl --header "Content-Type: application/json" --request POST --data "$post_data" http://192.168.31.11:8123/api/webhook/openwrt-webhook-id
由于openwrt固件繁多,有些网络接口可能不一样,interface="eth1" 其中的eth1请修改为自己的,最后一行192.168.31.11:8123换成自己的HA地址
2.新建一个名为 execute_script.sh 的文件,代码如下 保存用winscp登录红米路由 上传到/root文件夹下 记得赋予777权限
#!/bin/sh

while true; do
    # 执行你的原始脚本
    sh /root/test.sh
    # Sleep for 30 seconds before the next iteration
    sleep 5
done
3.进入HA的configuration.yaml 将以下代码粘贴进去,保存后记得重启HA
template:
  - trigger:
      - platform: webhook
        webhook_id: openwrt-webhook-id
    sensor:
       - name: "openwrt Temperature_CPU"
         state: "{{ trigger.json.temp_cpu }}"
         unit_of_measurement: °C

       - name: "openwrt Temperature_24G"
         state: "{{ trigger.json.temp_24g }}"
         unit_of_measurement: °C

       - name: "openwrt Temperature_5G"
         state: "{{ trigger.json.temp_5g }}"
         unit_of_measurement: °C

       - name: "openwrt cpuload_1m"
         state: "{{ trigger.json.cpuload_1m }}"
         unit_of_measurement: avg

       - name: "openwrt cpu_usage"
         state: "{{ trigger.json.cpu_usage }}"
         unit_of_measurement: "%"

       - name: "openwrt free_memory_mb"
         state: "{{ trigger.json.free_memory_mb }}"
         unit_of_measurement: Mib


       - name: "openwrt used_memory_mb"
         state: "{{ trigger.json.used_memory_mb }}"
         unit_of_measurement: Mib

       - name: "openwrt download_speed"
         state: "{{ trigger.json.download_speed }}"
         unit_of_measurement: MB/s

       - name: "openwrt upload_speed"
         state: "{{ trigger.json.upload_speed }}"
         unit_of_measurement: MB/s
4.登录红米路由器的ssh,运行nohup ./execute_script.sh > /dev/null 2>&1 &

至此,就能看到HA的数据更新了 我设置的是每5秒循环一次 可以通过execute_script.sh修改频率
|