篇五扩展:hass插件配置入门,学会找问题
我发现很多新手配置插件一顿骚操作,然后发现不是这有问题就是那有问题,所以我们先写一下到底怎么配置插件,我用一个常用的插件做说明hf-weather。
带有界面插件配置
hf-weather
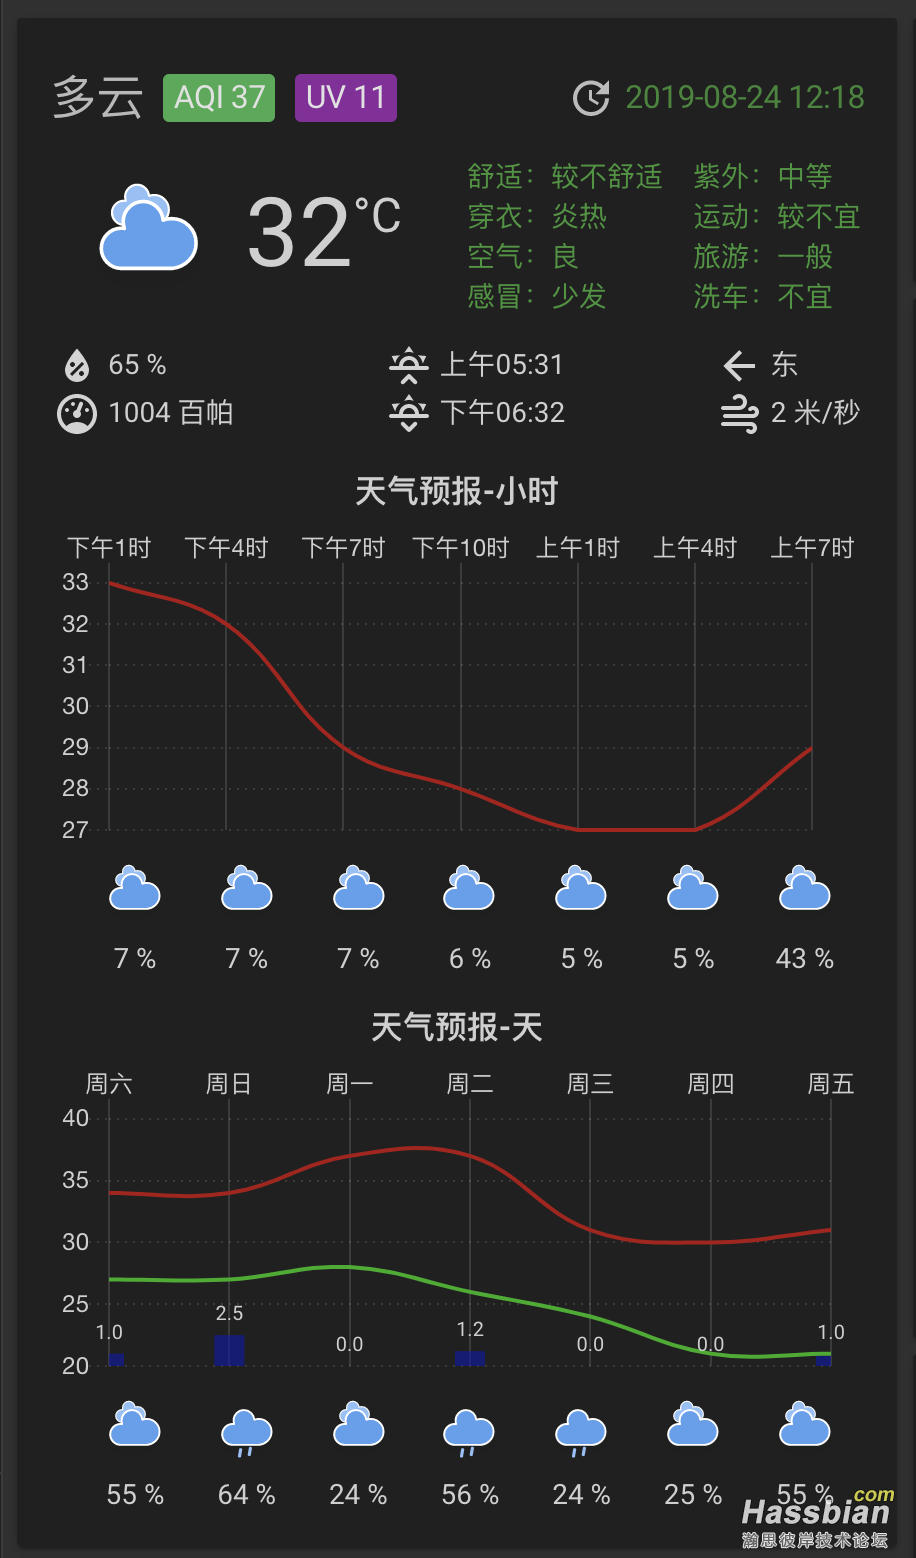
大家可以直接选择原作者hf_weather ,或者我改过增加uv并修改bug的版本, hf-weather 不过有一点注意,两个版本不兼容,因为我改了底层参数,如果修改版本尽量完整重新来一遍。
安装插件

基本上插件如果仅仅是后台组件的,就是没有定制化页面的一般只有custom_components目录,如果有前端的基本都需要改动www,这个目录。\n我们先把插件下载下来。
我比较懒的上传,所以我直接安装hass.io里的 SSH & Web Terminal 插件,然后通过这个插件直接用git把代码拉下拉,大家可以用smb协议或者其他上传方式,用 Configurator 也可以一个一个上传上去,这两种通过hass.io安装的插件都属于系统插件,只是针对更方便的方式进行控制hass。
装好ssh,配置一下密码在启动,并且密码要复杂一点,否则无法启动的。
{
  "ssh": {
    "username": "admin",
    "password": "admin1A!",
    "authorized_keys": [],
    "sftp": false,
    "compatibility_mode": false,
    "allow_agent_forwarding": false,
    "allow_remote_port_forwarding": false,
    "allow_tcp_forwarding": false
  },
  "web": {
    "ssl": false,
    "certfile": "fullchain.pem",
    "keyfile": "privkey.pem"
  },
  "share_sessions": true,
  "packages": [],
  "init_commands": []
}
启动成功,进入web ssh界面
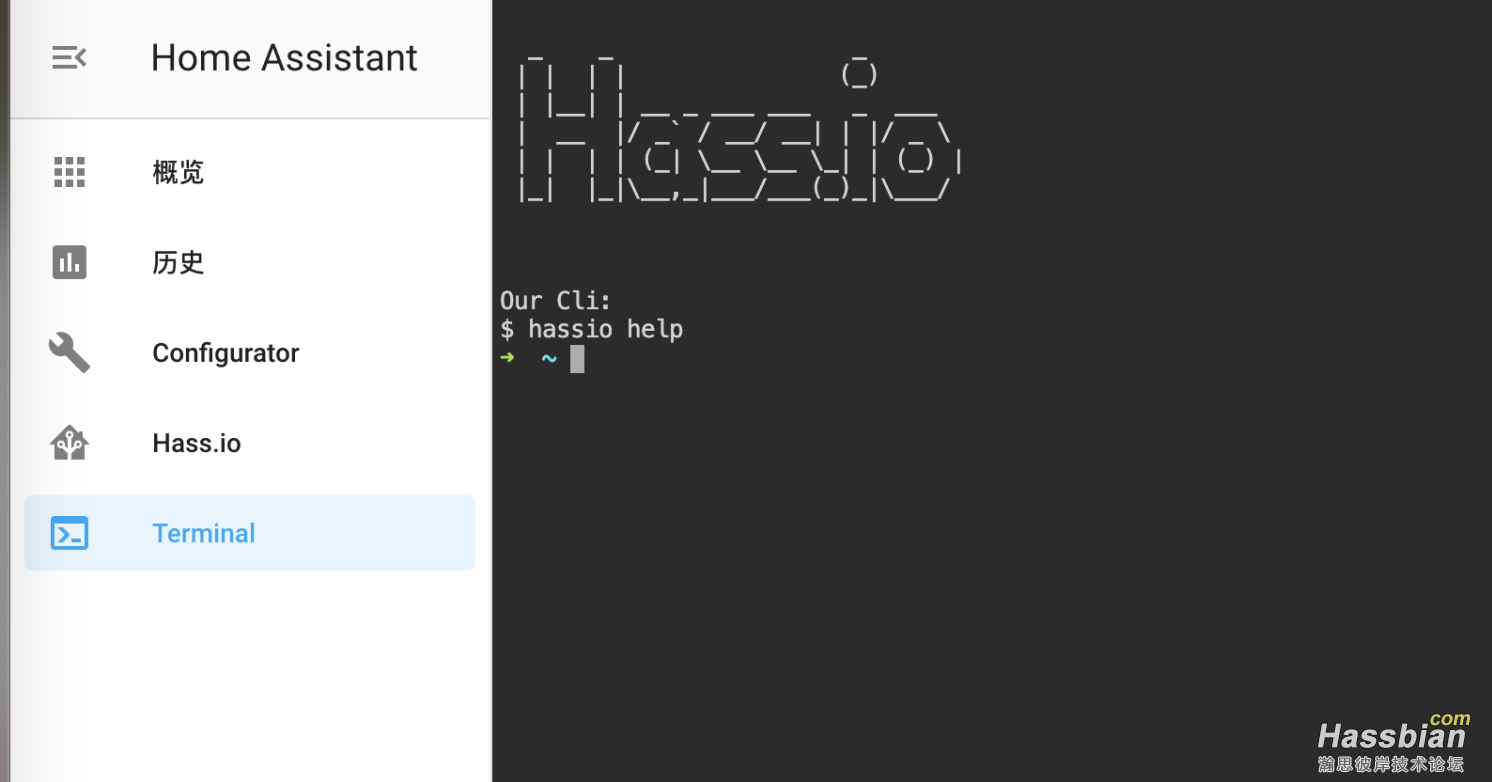
我们进入 cd /config ,然后下载插件。
git clone https://github.com/meishild/hass-custom-components.git

ls -al

# 如果你安装过插件应该有custom_components这个目录,那就只需要复制对应插件目录就可以了.
cp -r hass-custom-components/hf-weather/custom_components/hf-weather custom_components/

# 如果和我一样空的那就连着custom_components目录一起复制
cp -r hass-custom-components/hf-weather/custom_components ./

插件复制好了,先重启hass,否则一会配置会报错,提示插件不存在。
重启好了,我们先配置yaml。
注意不管什么插件yaml一定需要配置,我们都先配置这个。
主要一下这个appkey,和风天气有两种key,一种来自官方,一种来自京东云,不能互相通用。
因为这个插件需要appkey的,所以需要按照https://wx.jdcloud.com/market/datas/26/10610,这个地址申请key,注册账号然后申请一下key。
我正常都会配置secret配置来隐藏密码一类的,但新手完全不明白那我们就两个都给把。
name:名字就随意了。\nlocation:支持local_ip,根据ip获取,101.21.221.31,指定ip以及22.25,114.1667指定经纬度三种方式。\nappkey:就是你获取的key
# https://wx.jdcloud.com/market/datas/26/10610   # api平台申请的key
weather:
  - platform: hf_weather
    name: !secret hf_weather_name
    location: !secret hf_weather_location
    appkey: !secret hf_weather_appkey
# https://wx.jdcloud.com/market/datas/26/10610   # api平台申请的key
weather:
  - platform: hf-weather
    name: 'myhome'
    location: 'local_ip' #
    appkey: 'appkey'
如果需要拆分天气信息的加上如下配置:
weather.myhome 这个代表是你天气的实体名,如果不知道就后配置,先重启,在去实体信息里找。
 # 拆分天气
  - platform: template
    sensors:
      weather_current_temp:
        friendly_name: "当前温度"
        unit_of_measurement: '°C'
        value_template: "{{ state_attr('weather.myhome', 'temperature') }}"
      weather_current_uv:
        friendly_name: "当前紫外线强度"
        value_template: "{{ state_attr('weather.myhome', 'uv')['uv'] }}"
      weather_current_rain:
        friendly_name: "当前下雨概率"
        unit_of_measurement: '%'
        value_template: "{{ state_attr('weather.myhome', 'forecast')[0]['probable_precipitation'] }}"
      weather_today_max_temp:
        friendly_name: "今天最高温度"
        unit_of_measurement: '°C'
        value_template: "{{ state_attr('weather.myhome', 'forecast')[0]['temperature'] }}"
      weather_today_min_temp:
        friendly_name: "今天最低温度"
        unit_of_measurement: '°C'
        value_template: "{{ state_attr('weather.myhome', 'forecast')[0]['templow'] }}"
保存,然后重启hass,注意每次插件配置好先重启,如果报错看错误,如果没有去看状态。
如果没什么问题,启动就能看到天气了,原生的样式,并且在状态里能看到信息。
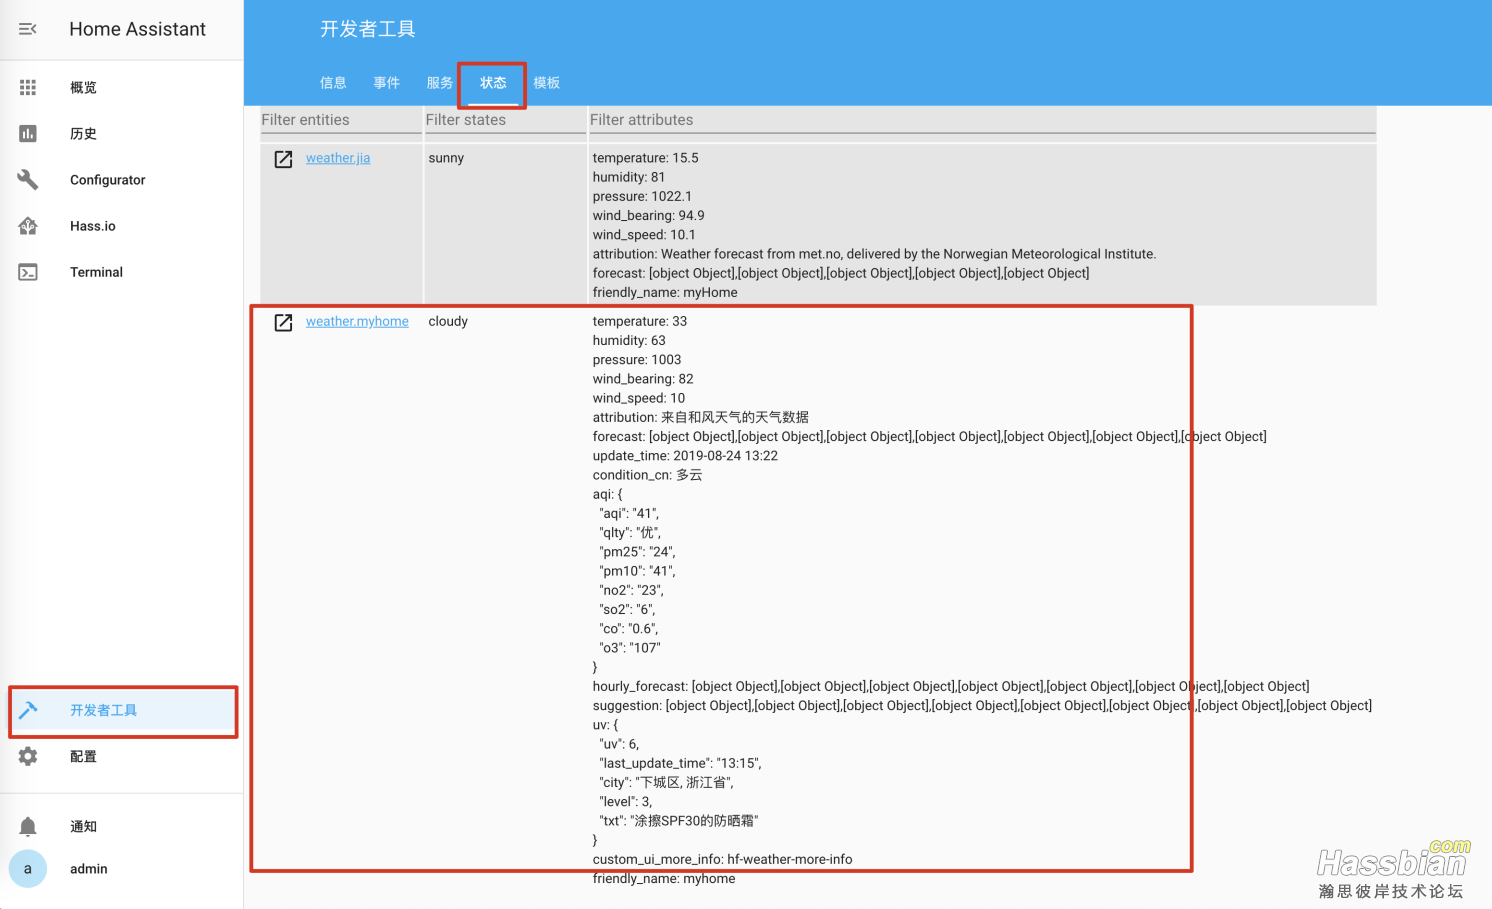
所有的插件只要是hass用的不知道装没装好都先来状态里看一下。
- 如果状态没有插件就有问题没装好。
- 如果状态正常展示一类的没有就是你展示没配置好。
- 先配置插件正常了在去研究展示
那这个插件自带样式,我们配置样式.
配置样式
先去webssh里把www目录建好,有的就不用了。
cd /config
mkdir www

cp -r hass-custom-components/hf-weather/www/custom-lovelace ./www
如果从来没有配置www这个目录是要重启hass的,然后配置页面上的lovelace组件。
概览 --> 右上角三个点 --> 配置ui --> 右上角三个点 --> 原始编辑器
在title上面配置resources:
resources:
  - type: module
    url: /local/custom-lovelace/hf-weather-card/hf-weather-card.js
  - type: module
    url: /local/custom-lovelace/hf-weather-card/hf-weather-more-info.js
然后保存,点插退出到正常,这里很多人不知道怎么看配置成功了没有,我们打开浏览器的监控。
chrome: 右键 --> 检查 --> network 然后刷新页面,就能看到一大堆加载,我们在里面找找这两个js文件是不是加载了。
- all里完全找不到就是配置错误没加载。
- 红色就是文件不存在检查路径。
好了如果这个都好了加载正常了,那我们在切换到原始编辑器下,配置如下内容。
resources:
  - type: module
    url: /local/custom-lovelace/hf-weather-card/hf-weather-card.js
  - type: module
    url: /local/custom-lovelace/hf-weather-card/hf-weather-more-info.js
title: myHome
views:
  - badges: []
    cards:
      - entity: weather.jia
        type: weather-forecast

      - type: 'custom:hf-weather-card'                                # card类型
        entity: weather.myhome                                         # entityid
        mode: daily                                                   # hourly按小时天气预报、daily按天天气预报,不设置则同时显示
        title: 天气                                                   # 标题,不设置则使用entity的friendly_name
        icons: /local/custom-lovelace/hf-weather-card/icons/animated/  # 图标路径,不设置则采用cdn,结尾要有"/"

    path: default_view
    title: Home
这里注意如果实体配置错误是没有任何数据的,实体不知道去开发者工具里找。
配置好了,这是发现怎么是一片白呢。
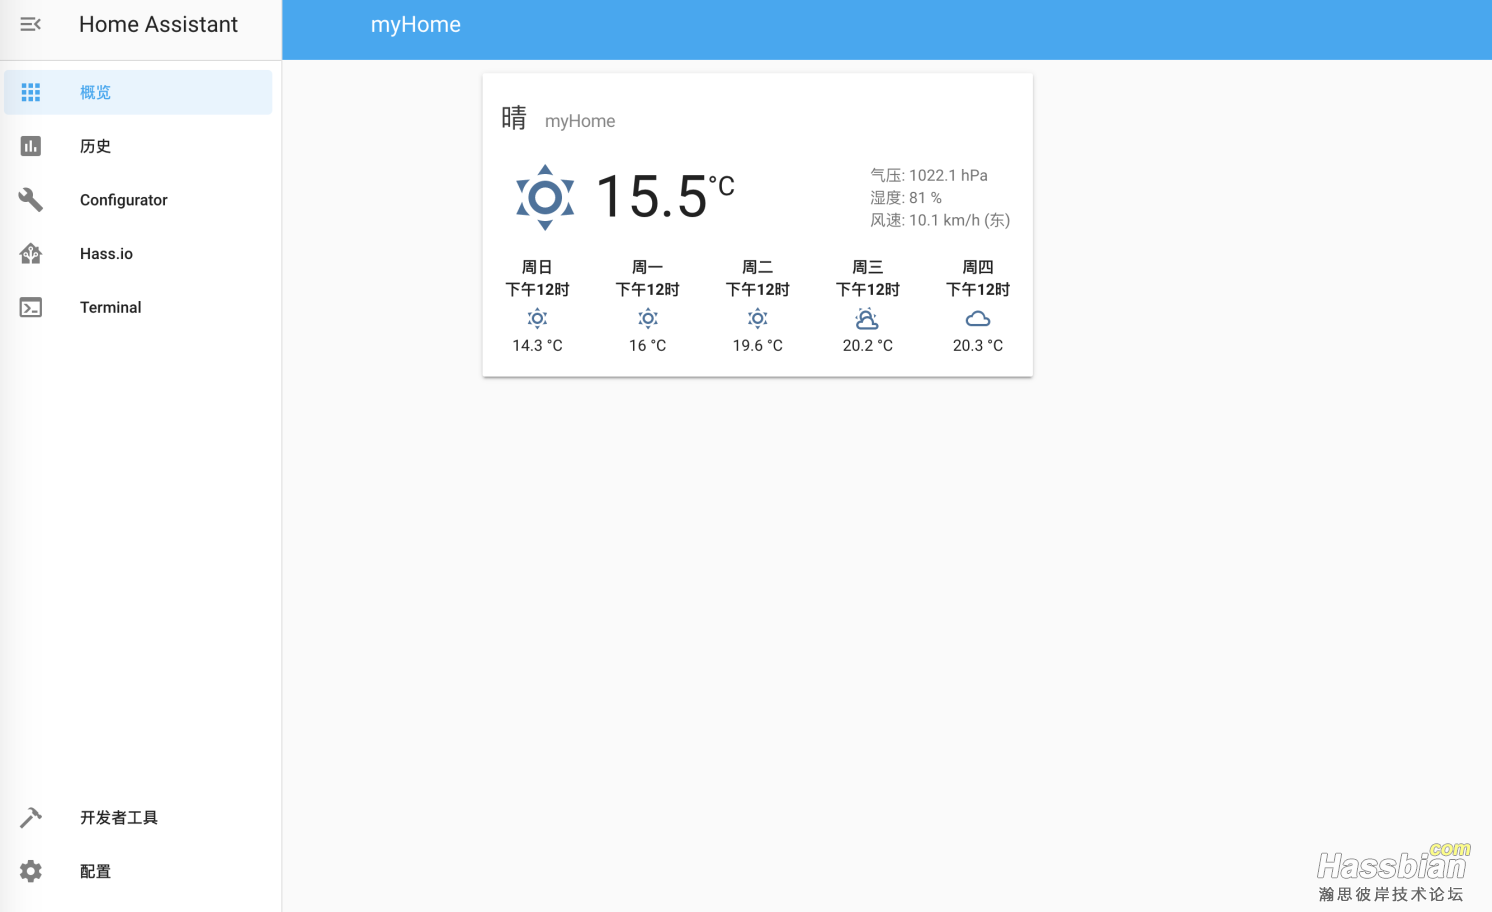
我们看看控制台有没有报错。
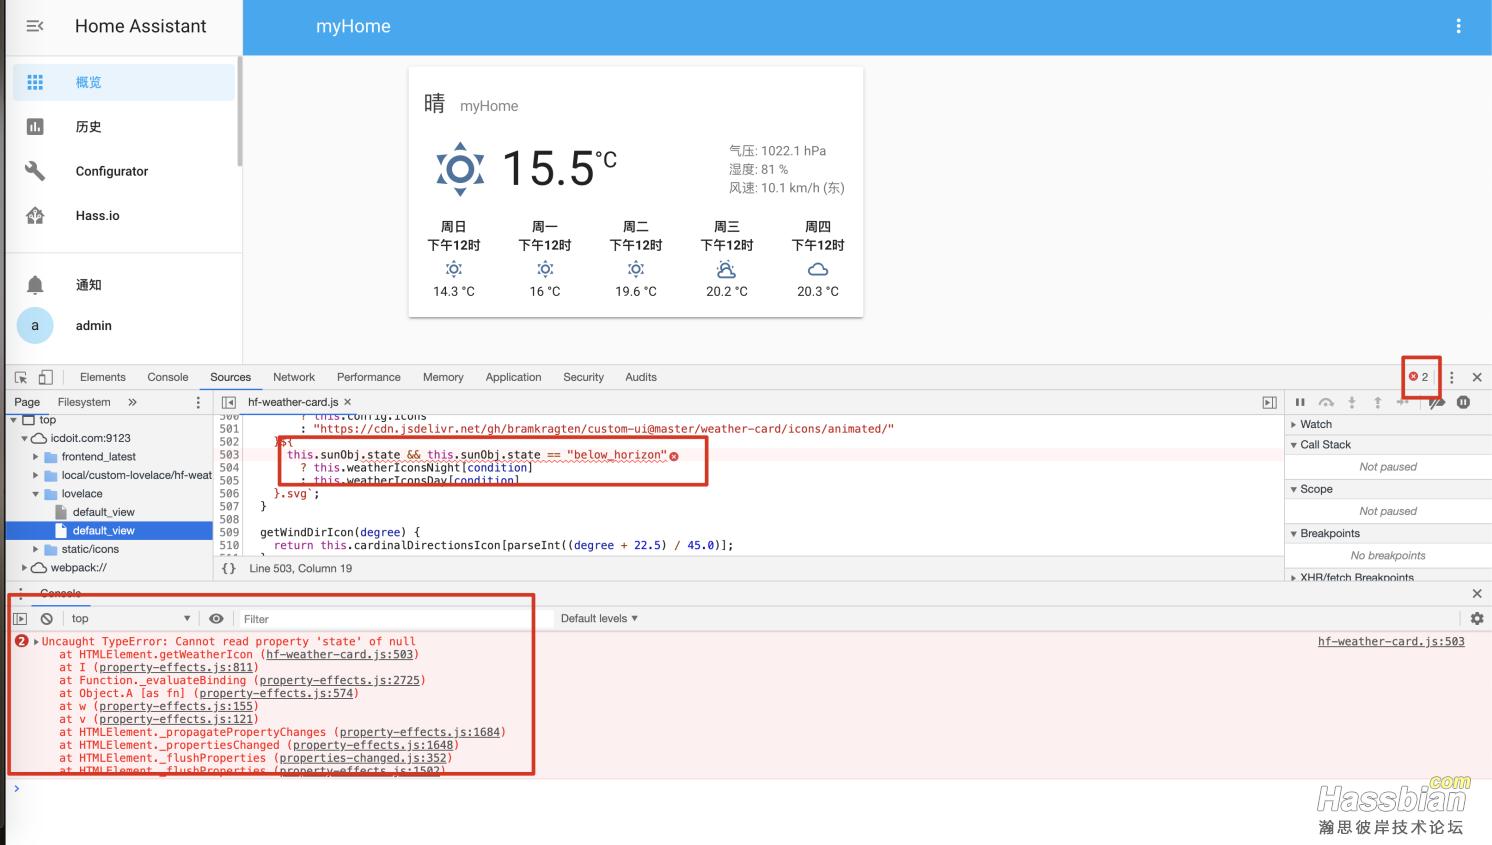
这里显示sunObj这个对象没有state这个类型,这是什么,原来这个插件依赖了hass的默认日落,如果不配置这个信息是展示不出来的,我们去yaml里打开sun。
打开yaml配置添加:
sun:
重启hass。
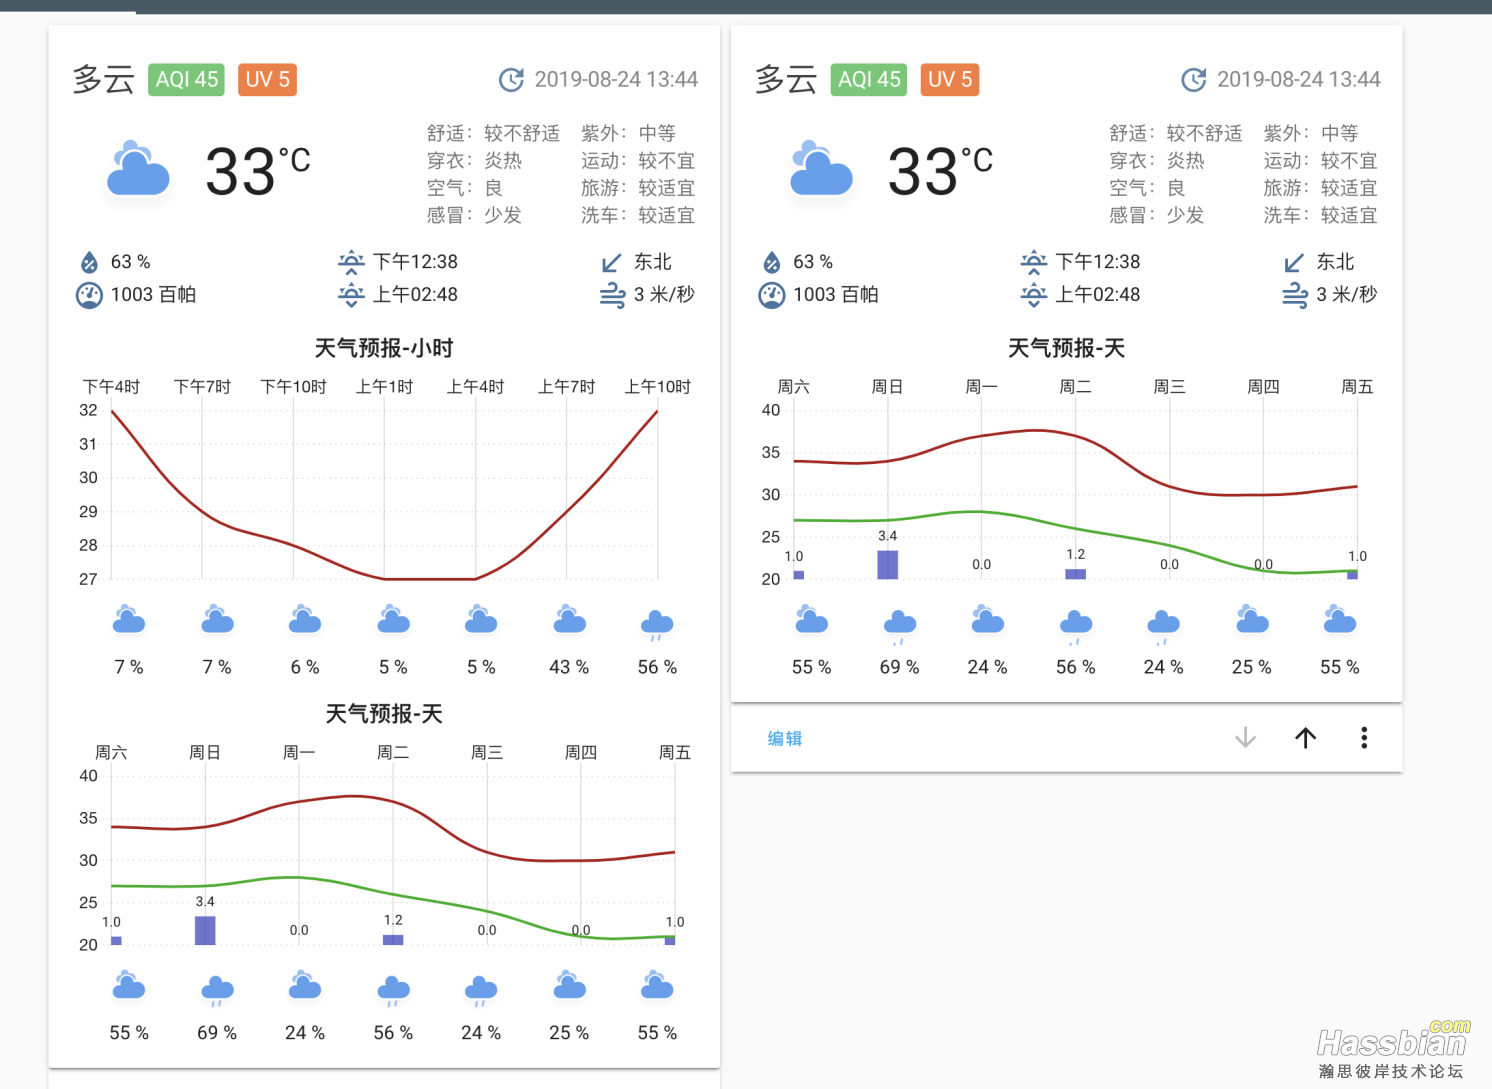
好了正常了,这个插件的mode可以配置不同的展示方式,both、daily。
总结一下:
- 不管你配置什么插件,都先配置yaml,先保证数据层面插件是正常的,并且能在开发者工具里看到数据。
- 只要是前端插件,很多都依赖三方的model,需要先配置,是否配置成功就是看js是否有加载。
- 都配置好了在配置展示。
- 如果你是升级插件,特别是修复js级别的,需要清理浏览器缓存,简单的清理就是打开network,勾选Disable Cache,然后刷新一下就可以了,这个选项只会在这个开发者模式下启用,关了不会启用的。
顺序不可乱,特别新手,否则完全不知道问题出在哪里。
