本帖最后由 hungheo 于 2025-5-17 17:31 编辑
0、写在前面
bubble card目前更新到beta7基本可以用了,
最大的特点是将template UI化了,还有模块商店,方便了UI操作
卡片的基础配置,UI上都可以操作,虽然全英文,配合翻译插件,多试试也能搞定
主要分享一下模板的使用和创建自定义模板模块
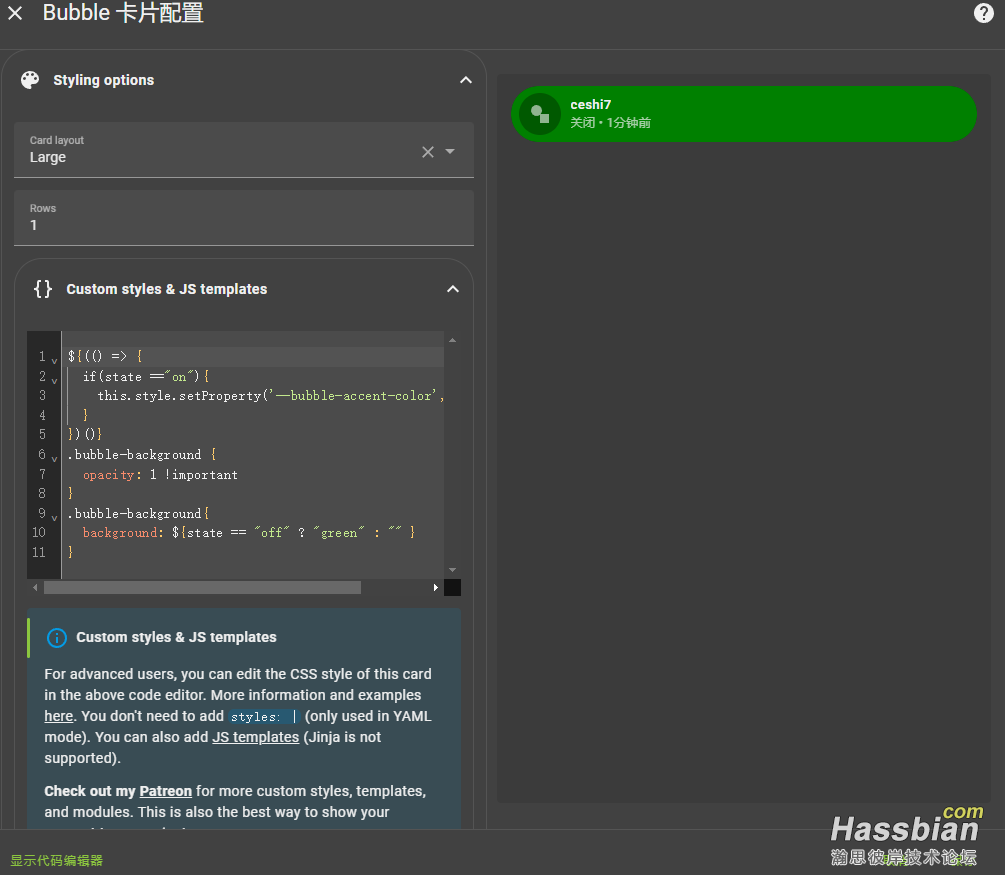
1、Styling options --> Custom styles & JS templates(自定义样式和JS模板)
Custom styles 与card-mod一模一样
JS templates 与button card js template类似
会card-mod和button card 的上手都比较快
具体的解释在插件主页有介绍:https://github.com/Clooos/Bubble-Card/tree/main?tab=readme-ov-file#templates
也可以参考我的另外两个帖子
card-mod:https://bbs.hassbian.com/thread-27399-1-1.html
button card:https://bbs.hassbian.com/thread-26299-1-1.html
例子:
创建一个button类型的卡片,默认是这样的:


修改Custom styles & JS templates
改变开启或关闭时的卡片背景颜色、透明度
用css和js哪个都可以,看个人习惯

代码: 效果:


2、Modules(模块)
是把 Styling options里面的Custom styles & JS templates 进行模块化封装
不同的是bubble的模块可以UI化,而且提供了模块商店,可以下载直接使用
2.1、启用Modules
将/www/community/Bubble-Card目录下的bubble-modules.yaml文件复制到/www/bubble/中
ha的configuration.yaml中添加:
homeassistant:
  allowlist_external_dirs:
    - /config/www/bubble
重启ha
2.2、UI编辑Modules
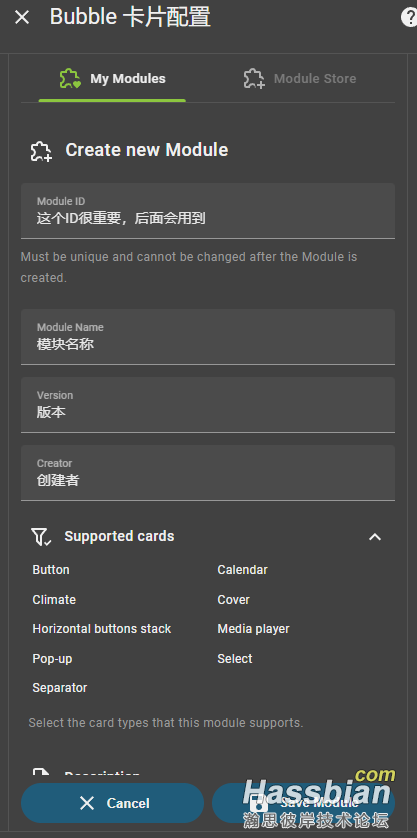
2.2.1、界面
Module ID 很重要,相当于button card的template名称,后面代码也会用到


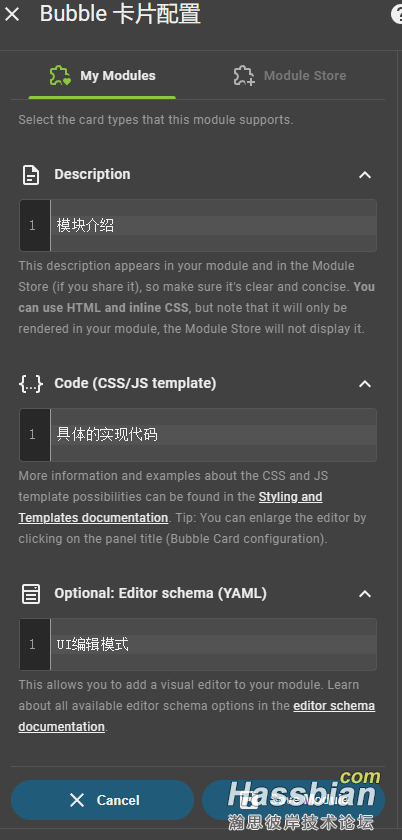
2.2.2、Optional: Editor schema(UI编辑模块)
创建后就跟通常的UI配置页面一样
配置说明在这里:https://github.com/Clooos/Bubble-Card/blob/main/src/modules/editor-schema-docs.md
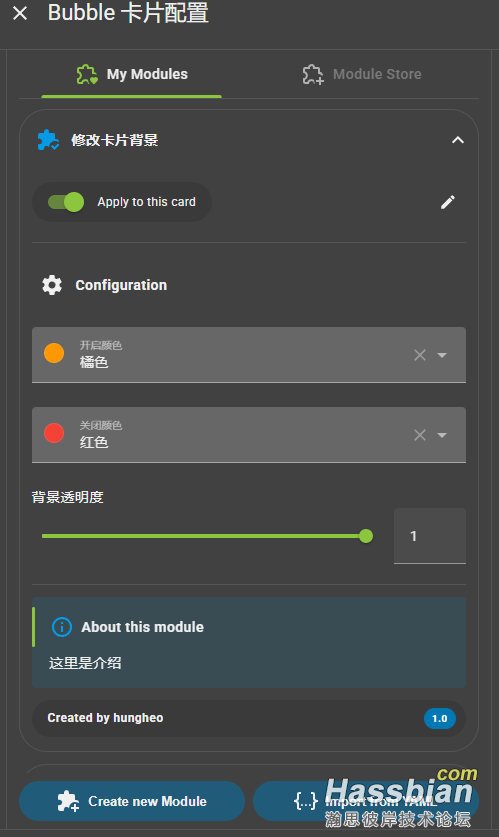
根据之前的模板,创建3个选择器: name必须是英文,是选择器的ID,后面也会用到
2.2.3、Code
里面的内容和格式与Custom styles & JS templates的配置是一样的
如果要引入UI选择器需要修改一下变量
引入UI选择器的变量格式:this.config.之前定义的模块ID?.UI选择器的name || 默认值
用之前的代码,修改下变量:
最后一步
别点保存模块,我现在的版本3.0.0.beta.7 保存不了,选择导出模版,然后复制到bubble-modules.yaml文件中,刷新浏览器。
完整的模块代码:
最终这个模块的UI编辑效果:

代码引用模块
type: custom:bubble-card
card_type: button
button_type: switch
modules:
  - default
  - test #模块ID
entity: input_boolean.ceshi7
show_attribute: true
show_state: true
show_last_changed: true
use_accent_color: false
show_icon: true
styles: ""
test:  #模块ID
  background_color_on: orange #选择器name
  background_color_off: red  #选择器name
  background_opacity: 1  #选择器name
写在最后
(1)、这是一个属于介绍性质的使用分享,用一段时间就熟悉了
(2)、难的是JS代码怎么写,我的代码能力比较弱,这里抛砖引玉了
(3)、要有好看的UI还是得配和使用card-mod和button card
|