- 积分
- 506
- 金钱
- 417
- 威望
- 0
- 贡献
- 0
- HASS币
- 0
高级会员
- 积分
- 506
- 金钱
- 417
- HASS币
- 0
|
 发表于 2024-5-13 18:22:59
|
显示全部楼层
本帖最后由 Jaing 于 2024-5-13 18:26 编辑
ESPHOME 本身就是一套系統
也能介接 HA 控制/傳感
但不否認,ESPHOME 比一般市售品更難親近
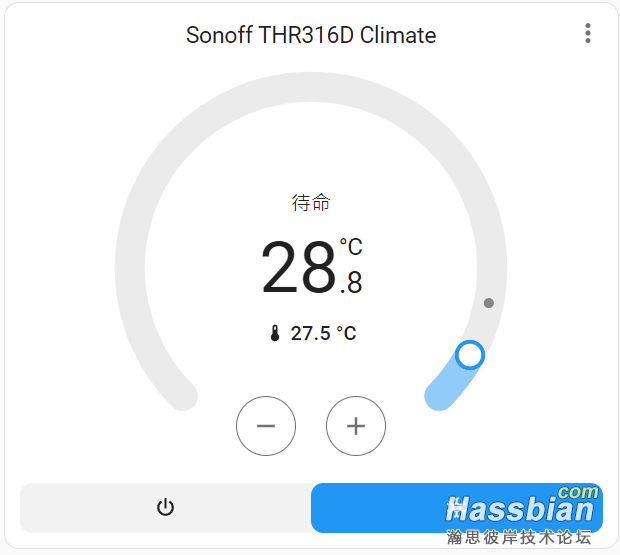
這是 SONOFF THR316D 獨立溫控的設定檔
(320不通用 要改 GPIO)
參考看看
substitutions:
name: "sonoffthr316d"
friendly_name: "Sonoff THR316D"
project_name: "thermostats"
project_version: "1.0"
light_restore_mode: RESTORE_DEFAULT_OFF
esphome:
name: "${name}"
# supply the external temp/hum sensor with 3v power by pulling this GPIO high
on_boot:
- priority: 90
then:
- switch.turn_on: ${name}_sensor_power
esp32:
board: nodemcu-32s
# Enable Home Assistant API
api:
# encryption:
# key: !secret api_encryption_key
ota:
# Enable logging
logger:
baud_rate: 0
logs:
component: ERROR
web_server:
port: 80
wifi:
ssid: !secret wifi_ssid
password: !secret wifi_password
ap:
ssid: "Thr316D Fallback Hotspot"
password: "XXXXX"
time:
- platform: homeassistant
id: homeassistant_time
captive_portal:
# This will take care of the display automatically.
# You don't need to tell it to print something to the display manually.
# It'll update every 60s or so.
display:
platform: tm1621
id: tm1621_display
cs_pin: GPIO17
data_pin: GPIO5
read_pin: GPIO23
write_pin: GPIO18
lambda: |-
it.printf(0, "%.1f", id(${name}_temp).state);
it.display_celsius(true);
it.printf(1, "%.1f", id(${name}_humi).state);
it.display_humidity(true);
binary_sensor:
# single main button that also puts device into flash mode when held on boot
- platform: gpio
pin:
number: GPIO0
mode: INPUT_PULLUP
inverted: True
name: "${friendly_name} Button"
on_press:
then:
- switch.toggle: mainRelayVirt
- platform: status
name: "${friendly_name} Status"
switch:
# virtual switch to represent the main relay
# as far as I know, we have no way to confirm the real state
- platform: template
id: mainRelayVirt
name: "Main Relay"
turn_on_action:
- switch.turn_on: mainRelayOn
- switch.turn_on: ${name}_onoff_led
turn_off_action:
# - switch.turn_on: mainRelayOff
- switch.turn_off: mainRelayOn
- switch.turn_off: ${name}_onoff_led
assumed_state: True
optimistic: True
restore_mode: ALWAYS_OFF
# internal momentary switch for main relay ON
- platform: gpio
id: mainRelayOn
internal: True
pin:
number: GPIO21
on_turn_on:
- switch.turn_on: mainRelayOn
# - delay: 500ms
# - switch.turn_off: mainRelayOn
restore_mode: ALWAYS_OFF
# dry contact relay switch
- platform: gpio
id: dryContRelay
name: "Dry Contact Relay"
pin:
number: GPIO4
on_turn_on:
- switch.turn_on: ${name}_idk_led
on_turn_off:
- switch.turn_off: ${name}_idk_led
# Rightmost (green) LED; use as dry contact indicator
- platform: gpio
id: ${name}_idk_led
pin:
number: GPIO13
inverted: true
# Leftmost (red) LED that's used to indicate the relay being on/off
- platform: gpio
id: ${name}_onoff_led
pin:
number: GPIO16
inverted: true
# This is needed to power the external temp/humidity sensor.
# It receives 3v from this pin, which is pulled up on boot.
# TODO: This should probably be an internal switch.
- platform: gpio
pin: GPIO27
id: ${name}_sensor_power
restore_mode: ALWAYS_ON
light:
# The middle (blue) LED is used as wifi status indicator.
- platform: status_led
name: "${friendly_name} State"
pin:
number: GPIO15
inverted: true
sensor:
# You need to specify here that it's an SI7021 sensor.
# This assumes you're using their device "Sonoff THS01"
- platform: dht
pin: GPIO25
model: SI7021
temperature:
name: "${friendly_name} Temperature"
id: ${name}_temp
humidity:
name: "${friendly_name} Humidity"
id: ${name}_humi
update_interval: 60s
climate:
- platform: thermostat
name: "${friendly_name} Climate"
sensor: ${name}_temp
default_preset: Home
preset:
- name: Home
default_target_temperature_high: 27.5 °C
mode: cool
min_cooling_off_time: 300s
min_cooling_run_time: 300s
min_idle_time: 30s
cool_action:
- switch.turn_on: mainRelayVirt
idle_action:
- switch.turn_off: mainRelayVirt
cool_deadband: 0.5 # how many degrees can we go under the temp before starting to heat
cool_overrun: 0.5 # how many degrees can we go over the temp before stopping
text_sensor:
- platform: wifi_info
ip_address:
name: "${friendly_name} IP Address"
disabled_by_default: true
external_components:
source:
type: git
url: https://github.com/Beungoud/esphome
ref: fix-esp32-dht-SI7021
components: ["dht"]
|
-

|