本帖最后由 hugo 于 2018-1-3 13:59 编辑
开始之前,先看看视频,比较直观理解,记得要全屏,打开高清打开声音调大音量!
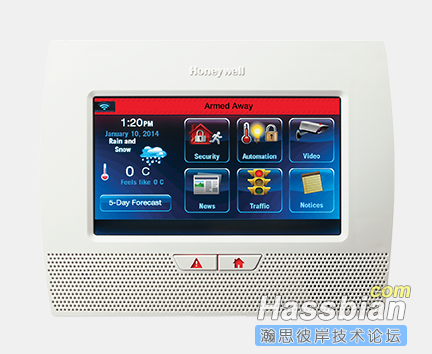
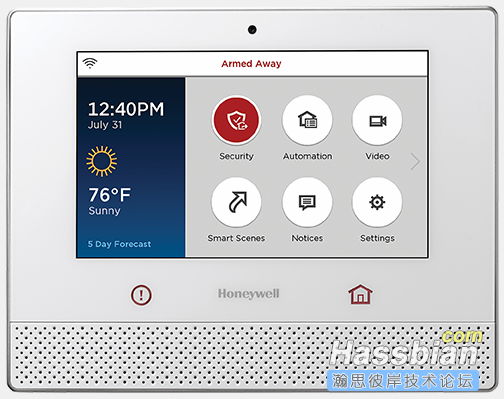
alarm组件,很少人会用到,其实这个在智能家居领域是非常重要的一个功能,那就是设防和解除设防。欧美发达国家有很多提供类似功能的厂家和产品,他们往往都是这样的:


大多数专业安防设备都会有挂墙终端,有些也提供移动终端,不管哪种方式,都不会像国内一些供应商一样,按个按钮就设防,再按一下就撤防,太儿戏了。一般都会登录,在你操作时候让你输入授权码或者操作码才能进行操作,因为这个和开灯关灯是不同安全授权级别的,一来不会被人乱按,二来作为挂墙控制终端坏人进来才不会随便可以撤除报警。在这里再介绍一下安防设置过程,一般操作码输入正确,才可以进行设防和撤防,设防常见的有两个模式,一个叫armed home,大家可以理解为人在家里,这时候一般让外部的传感器生效,内部的传感器忽略,一个叫armed away,大家可以理解为外出时候设防,一般会启用所有传感器,比如内外部门窗,人体感应等,还有个叫armed night,就是用于夜晚。一般在操作设防时候,还会有个倒计时,为何要倒计时,例如像室外设防,你可以是在室内设置的,这时候你设好后,还要出门,如果立即生效,马上就触发,所以有个缓冲时间,另外一个好处时,你设好后,突然改变意见了,也可以立即撤销。
智能家居爱好者应该有些看过银翼杀手2049了吧,你看未来都没手机了,但是中控主机面板仍然存在,啊哈哈哈。见下图:


进入正题,本帖子将一步步教大家,怎么启用home assistant的alarm安防系统,并利用home assistant 的中控界面 HAdashboard实现更牛逼真实的安防设防和撤防效果。
(1)在configuration.yaml 添加alarm组件,因为手头也没其他各大官方支持厂商的设备,选用了个通用版本安防组件为例:
alarm_control_panel:
  - platform: manual
    name: Alarm
    code: 1688
    pending_time: 6
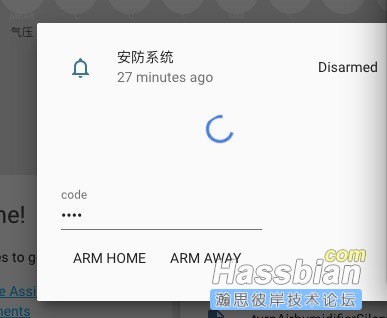
其中,code为授权码或操作码,pending time可以理解为倒计时时间。重启home assistant后,你将会在状态栏看到这个图标,并可以进行操作。同时状态也根据不同操作变化,其实这里的操作就是一个带密码的按钮,只有输入密码,才能操作设防,撤防。


(2)建立自动化。建立自动化的思路很简单。当状态撤防变在家设防,即让室外传感器生效。当状态由撤防变离家设防,则让所有传感器生效。室外传感器生效,室内传感器生效,其实都是单独作为一个自动化,也即是当你操作设防时候,就让这个自动化生效。当你撤防时候,就让这个自动化关闭即可。在这里因为有倒计时,所以也可以在倒计时时候,进行倒计时播报。什么叫让传感器生效,其实传感器一直生效的,只不过,感应到动作或者异常是选择忽略还是报警通知而已,这么说大家应该就清楚了,具体可以参考以下的自动化。这里利用了绿米网关的播放警报和提示音,大家也可以按自己需要触发其他动作。
- action:
  - data:
      gw_mac: 1234299AFFFF
      ringtone_id: '10001'
    service: xiaomi_aqara.play_ringtone
  alias: Pending
  condition: []
  id: '1514828804621'
  trigger:
  - entity_id: alarm_control_panel.alarm
    from: disarmed
    platform: state
    to: pending
- action:
  - data:
      gw_mac: 1234299AFFFF
      ringtong_id: '10002'
    service: xiaomi_aqara.play_ringtone
  alias: outside_sensor Active
  condition: []
  id: '1514829784502'
  trigger:
  - entity_id: binary_sensor.motion_sensor_158d0000df9555
    from: 'off'
    platform: state
    to: 'on'
- action:
  - data:
      gw_mac: 1234299AFFFF
      ringtong_id: '10002'
    service: xiaomi_aqara.play_ringtone
  alias: allsensor_active
  condition: []
  id: '1514830055227'
  trigger:
  - entity_id: binary_sensor.motion_sensor_158d0000df9555
    from: 'off'
    platform: state
    to: 'on'
  - entity_id: binary_sensor.door_window_sensor_158d0000d6c3b8
    from: 'off'
    platform: state
    to: 'on'
  - entity_id: binary_sensor.motion_sensor_158d0000fbc7c3
    from: 'off'
    platform: state
    to: 'on'
- action:
  - data:
      entity_id: automation.outside_sensor_active
    service: automation.turn_on
  alias: armed home
  condition: []
  id: '1514830389791'
  trigger:
  - entity_id: alarm_control_panel.alarm
    from: pending
    platform: state
    to: armed_home
- action:
  - data:
      entity_id: automation.allsensor_active
    service: automation.turn_on
  alias: armed away
  condition: []
  id: '1514830529115'
  trigger:
  - entity_id: alarm_control_panel.alarm
    from: pending
    platform: state
    to: armed_away
- action:
  - data:
      entity_id: automation.allsensor_active
    service: automation.turn_off
  - data:
      entity_id: automation.outside_sensor_active
    service: automation.turn_off
  alias: Disarmed
  condition: []
  id: '1514830818075'
  trigger:
  - entity_id: alarm_control_panel.alarm
    from: armed_away
    platform: state
    to: disarmed
  - entity_id: alarm_control_panel.alarm
    from: armed_home
    platform: state
    to: disarmed
(3)其实到这里已经完成了,剩下的就是中控面板的设置,HAdashboard中进行一下配置:
alarm:
    widget_type: alarm
    title: 安防系统
    title_style:  "font-size: larger;"
    entity: alarm_control_panel.alarm

layout:
- alarm(2x1)
具体图示:懒得截图了,做了个视频,感兴趣的看看效果。
记得要全屏,打开高清打开声音调大音量!
|