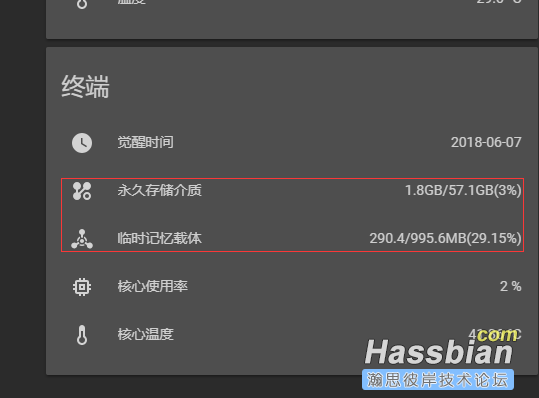
可能大家会奇怪为什么已经内置了传感器还需要自己写脚本
其实很简单,因为内置传感器仅仅显示单个使用率数据,并非包含总量使用量和使用率
实现效果如图

代码就不隐藏了直接放出来了
硬盘使用量 disk.py
import os
def getDiskSpace():
    p = os.popen("df -h /")
    i = 0
    while 1:
        i = i +1
        line = p.readline()
        if i==2:
            return(line.split()[1:5])

DISK_stats = getDiskSpace()
DISK_total = DISK_stats[0]
DISK_used = DISK_stats[1]
DISK_perc = DISK_stats[3]

print(str(DISK_used) + 'B/' + str(DISK_total) + 'B' + '(' + str(DISK_perc) + ')')
内存使用量 ram.py
import os
def getRAMinfo():
    p = os.popen('free')
    i = 0
    while 1:
        i = i + 1
        line = p.readline()
        if i==2:
            return(line.split()[1:7])


RAM_stats = getRAMinfo()
RAM_total = round(int(RAM_stats[0]) / 1000,1)
RAM_used = round((int(RAM_stats[1]) - int(RAM_stats[5]) - int(RAM_stats[4])) / 1000,1)
RAM_rate = round(int(RAM_used)* 100 / int(RAM_total),2)

print(str(RAM_used) + '/' + str(RAM_total) + 'MB' + '(' + str(RAM_rate) + '%)')
注意!mossbian可以放在任意目录下你记得就好。但是hass.io请放在smb的4个文件下!不建议放在config和addons
在configuration.yaml下添加 command为文件目录
sensor:
  - platform: command_line
    name: disk
    command: "python3 /share/disk.py"
  - platform: command_line
    name: ram
    command: "python3 /share/ram.py"
|