本帖最后由 花落花空 于 2022-8-8 10:07 编辑
前段时间以13.8的优惠价在爱蜥蜴买了群友提到的CEM5855H人体存在传感器(1115H的后继版本吧)规格和1115h一毛一样。
想着把这玩意放在灯罩里是个不错的选择,就开始研究:
家里灯光之前的设置如下
1:灯的驱动是接收红外信号
2:灯的开关已经改成了长按5秒通断电,单击通过万能红外遥控发信号开关灯,所以我家的这个主灯是一直通电的,为这次魔改提供了条件。
研究时拆开了驱动,研究电路发现就是一个小单片机接收红外信号后输出两路pwm信号来控制调光调色。所以我直接拆掉了原来的单片机,引出2根信号线和地线(下图白色线为冷光pwm,黄色为暖光pwm,黑色电源地,橙色5v(未用))
画板时是以ESP32-C3-12F来画的,但事后发现C3在ESPHome下启用不了遥控接收,遂又换回8266 12F,好在它们封装一样.
选择io4,5来做pwm信号,使用两颗7002做电平转换。元器件排成一排。还加上了一个射频模块的位置。
程序方面:
程序还是使用了esphome,这个模块的发货周期很长,等我的模块到祸后,论坛里已经有大佬写出了1115H的在线调参配置 @lannister
因为本来就觉得这俩是一个东西,所以直接Ctrl C+V 了过来,果然是完美可用的。
贴一下我现在的配置,仅供参考
esphome:
  name: xxxx
  includes:
    - uart_read_line_sensor.h
esp8266:
  board: nodemcuv2
#esp32:
#  board: esp32-c3-devkitm-1
#  variant: esp32c3
#  framework:
#    type: arduino
#    version: 2.0.2
#    platform_version: https://github.com/tasmota/platform-espressif32/releases/download/v2.0.2.3/platform-espressif32-2.0.2.3.zip

#  board: esp32-c3-devkitm-1
#  framework:
#    type: esp-idf
#    sdkconfig_options:
#      CONFIG_BT_BLE_42_FEATURES_SUPPORTED: y
# Enable logging
logger:
  baud_rate: 0

# Enable Home Assistant API
api:

ota:
  password: "xxxxx"

wifi:
  ssid: !secret wifi_ssid
  password: !secret wifi_password

  # Enable fallback hotspot (captive portal) in case wifi connection fails
  ap:
    ssid: "Livingroom-Light"
    password: "MbNabAnGiTDG"
globals:
  - id: my_global_int
    type: int
    restore_value: no
    initial_value: '0'
uart:
  id: uart_bus
  rx_pin: 3 #3
  tx_pin: 1 #1
  baud_rate: 115200
substitutions:
  device_name: livingroom_light
captive_portal:
binary_sensor:
  - platform: gpio
    id: motion
    pin:
      number: 14
      mode: INPUT_PULLUP
#      inverted: True
    name: "${device_name} motion"
    device_class: motion
#    filters:
#      delayed_off: 15s
number:
  - platform: template
    id: motion_th1
    name: "${device_name} movement sensitivity"
    mode: box
    optimistic: true
    min_value: 0
    max_value: 500
    step: 1
    restore_value: true
    initial_value: 120
    on_value:
      then:
      - uart.write: !lambda
          int v = (int)x;
          std::string cmd = "th1=" + to_string(v);
          return std::vector<unsigned char>(cmd.begin(), cmd.end());
      - delay: 100ms
      - uart.write: "save"
      - logger.log:
          format: "th1 is %.1f"
          args: [ 'id(motion_th1).state' ]
  - platform: template
    id: motion_th2
    name: "${device_name} presence sensitivity"
    mode: box
    optimistic: true
    min_value: 0
    max_value: 500
    step: 1
    restore_value: true
    initial_value: 250
    on_value:
      then:
      - uart.write: !lambda
          int v = (int)x;
          std::string cmd = "th2=" + to_string(v);
          return std::vector<unsigned char>(cmd.begin(), cmd.end());
      - delay: 100ms
      - uart.write: "save"
      - logger.log:
          format: "th2 is %.1f"
          args: [ 'id(motion_th2).state' ]

  - platform: template
    id: occ_sn
    name: "${device_name} maintenance condition"
    disabled_by_default: true
    optimistic: true
    mode: box
    min_value: 1
    max_value: 100
    step: 1
    restore_value: true
    initial_value: 3
    on_value:
      then:
      - uart.write: !lambda
          int v = (int)x;
          std::string cmd = "occ_sn=" + to_string(v);
          return std::vector<unsigned char>(cmd.begin(), cmd.end());
      - delay: 100ms
      - uart.write: "save"
      - logger.log:
          format: "occ_sn set %.1f"
          args: [ 'id(occ_sn).state' ]

  - platform: template
    id: motion_dtime
    name: "${device_name} Detection delay"
    icon: "mdi:clock-time-four"
    mode: box
    disabled_by_default: true
    optimistic: true
    min_value: 1
    max_value: 300
    step: 1
    restore_value: true
    initial_value: 5
    on_value:
      then:
      - uart.write: !lambda
          int v = (int)x;
          std::string cmd = "dtime=" + to_string(v);
          return std::vector<unsigned char>(cmd.begin(), cmd.end());
      - delay: 100ms
      - uart.write: "save"
      - logger.log:
          format: "dtime set %.1f"
          args: [ 'id(motion_dtime).state' ]

  - platform: template
    id: mov_sn
    name: "${device_name} Triggering conditions"
    optimistic: true
    disabled_by_default: true
    min_value: 1
    max_value: 100
    step: 1
    restore_value: true
    mode: box
    initial_value: 5
    on_value:
      then:
      - uart.write: !lambda
          int v = (int)x;
          std::string cmd = "mov_sn=" + to_string(v);
          return std::vector<unsigned char>(cmd.begin(), cmd.end());
      - delay: 100ms
      - uart.write: "save"
      - logger.log:
          format: "mov_sn set %.1f"
          args: [ 'id(mov_sn).state' ]


button:
  - platform: template
    name: "${device_name} 查看配置"
    on_press:
      - uart.write: "get_all"

text_sensor:
- platform: custom
  lambda: |-
    auto my_custom_sensor = new UartReadLineSensor(id(uart_bus));
    App.register_component(my_custom_sensor);
    return {my_custom_sensor};
  text_sensors:
    id: uart_readline
    name: "${device_name} 串口输出"


output:
  - platform: esp8266_pwm
    pin: 4  #8266
#    pin: 18  #C3
    frequency: 1000 Hz
    id: cw
    inverted: true
    min_power: 0.0135
    max_power: 1
  - platform: esp8266_pwm #ledc
    pin: 5  #8266
#    pin: 19  #C3
    frequency: 1000 Hz
    id: ww
    inverted: true
    min_power: 0.0135
    max_power: 1
light:
  - platform: cwww
    name: "Livingroom Lights"
    cold_white: cw
    warm_white: ww
    cold_white_color_temperature: 6536 K
    warm_white_color_temperature: 2000 K
    constant_brightness: true
    restore_mode: ALWAYS_ON
    effects:
      - pulse:
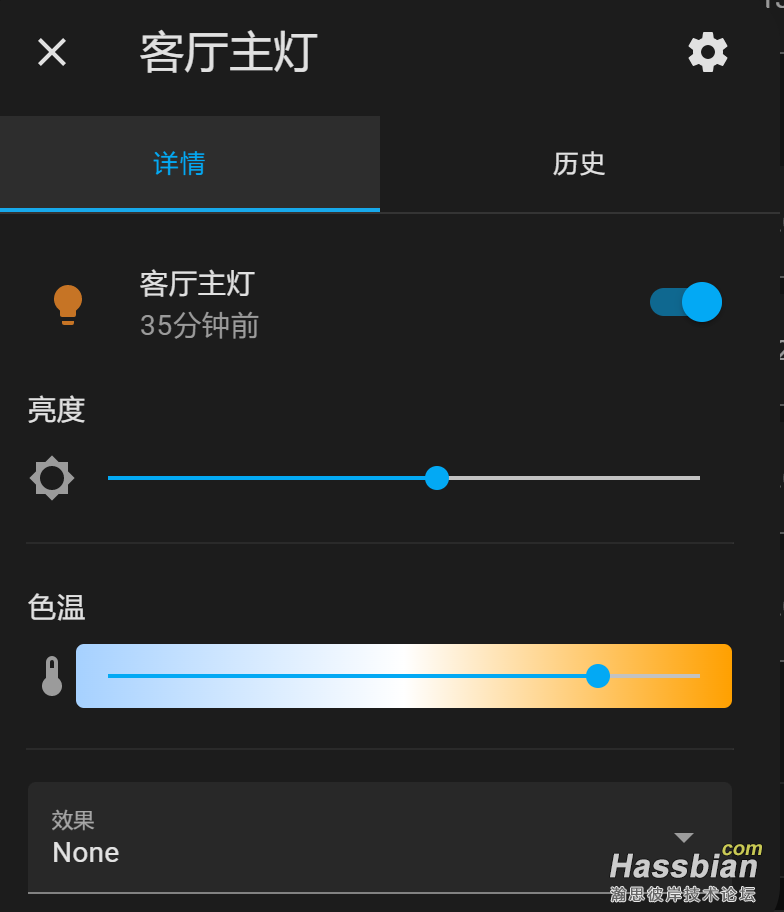
改完后就能直接友好的调色温亮度了
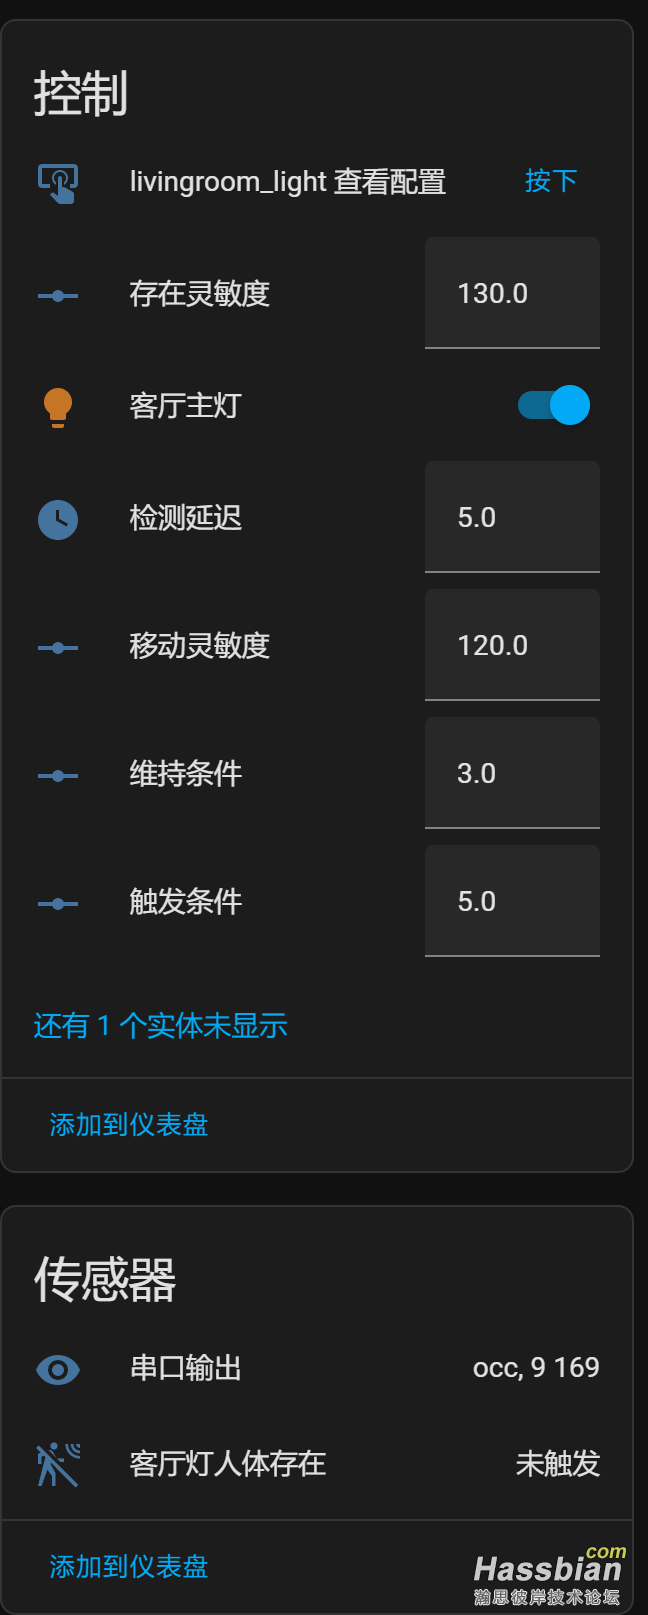
调参界面
板子先到了,简单焊下
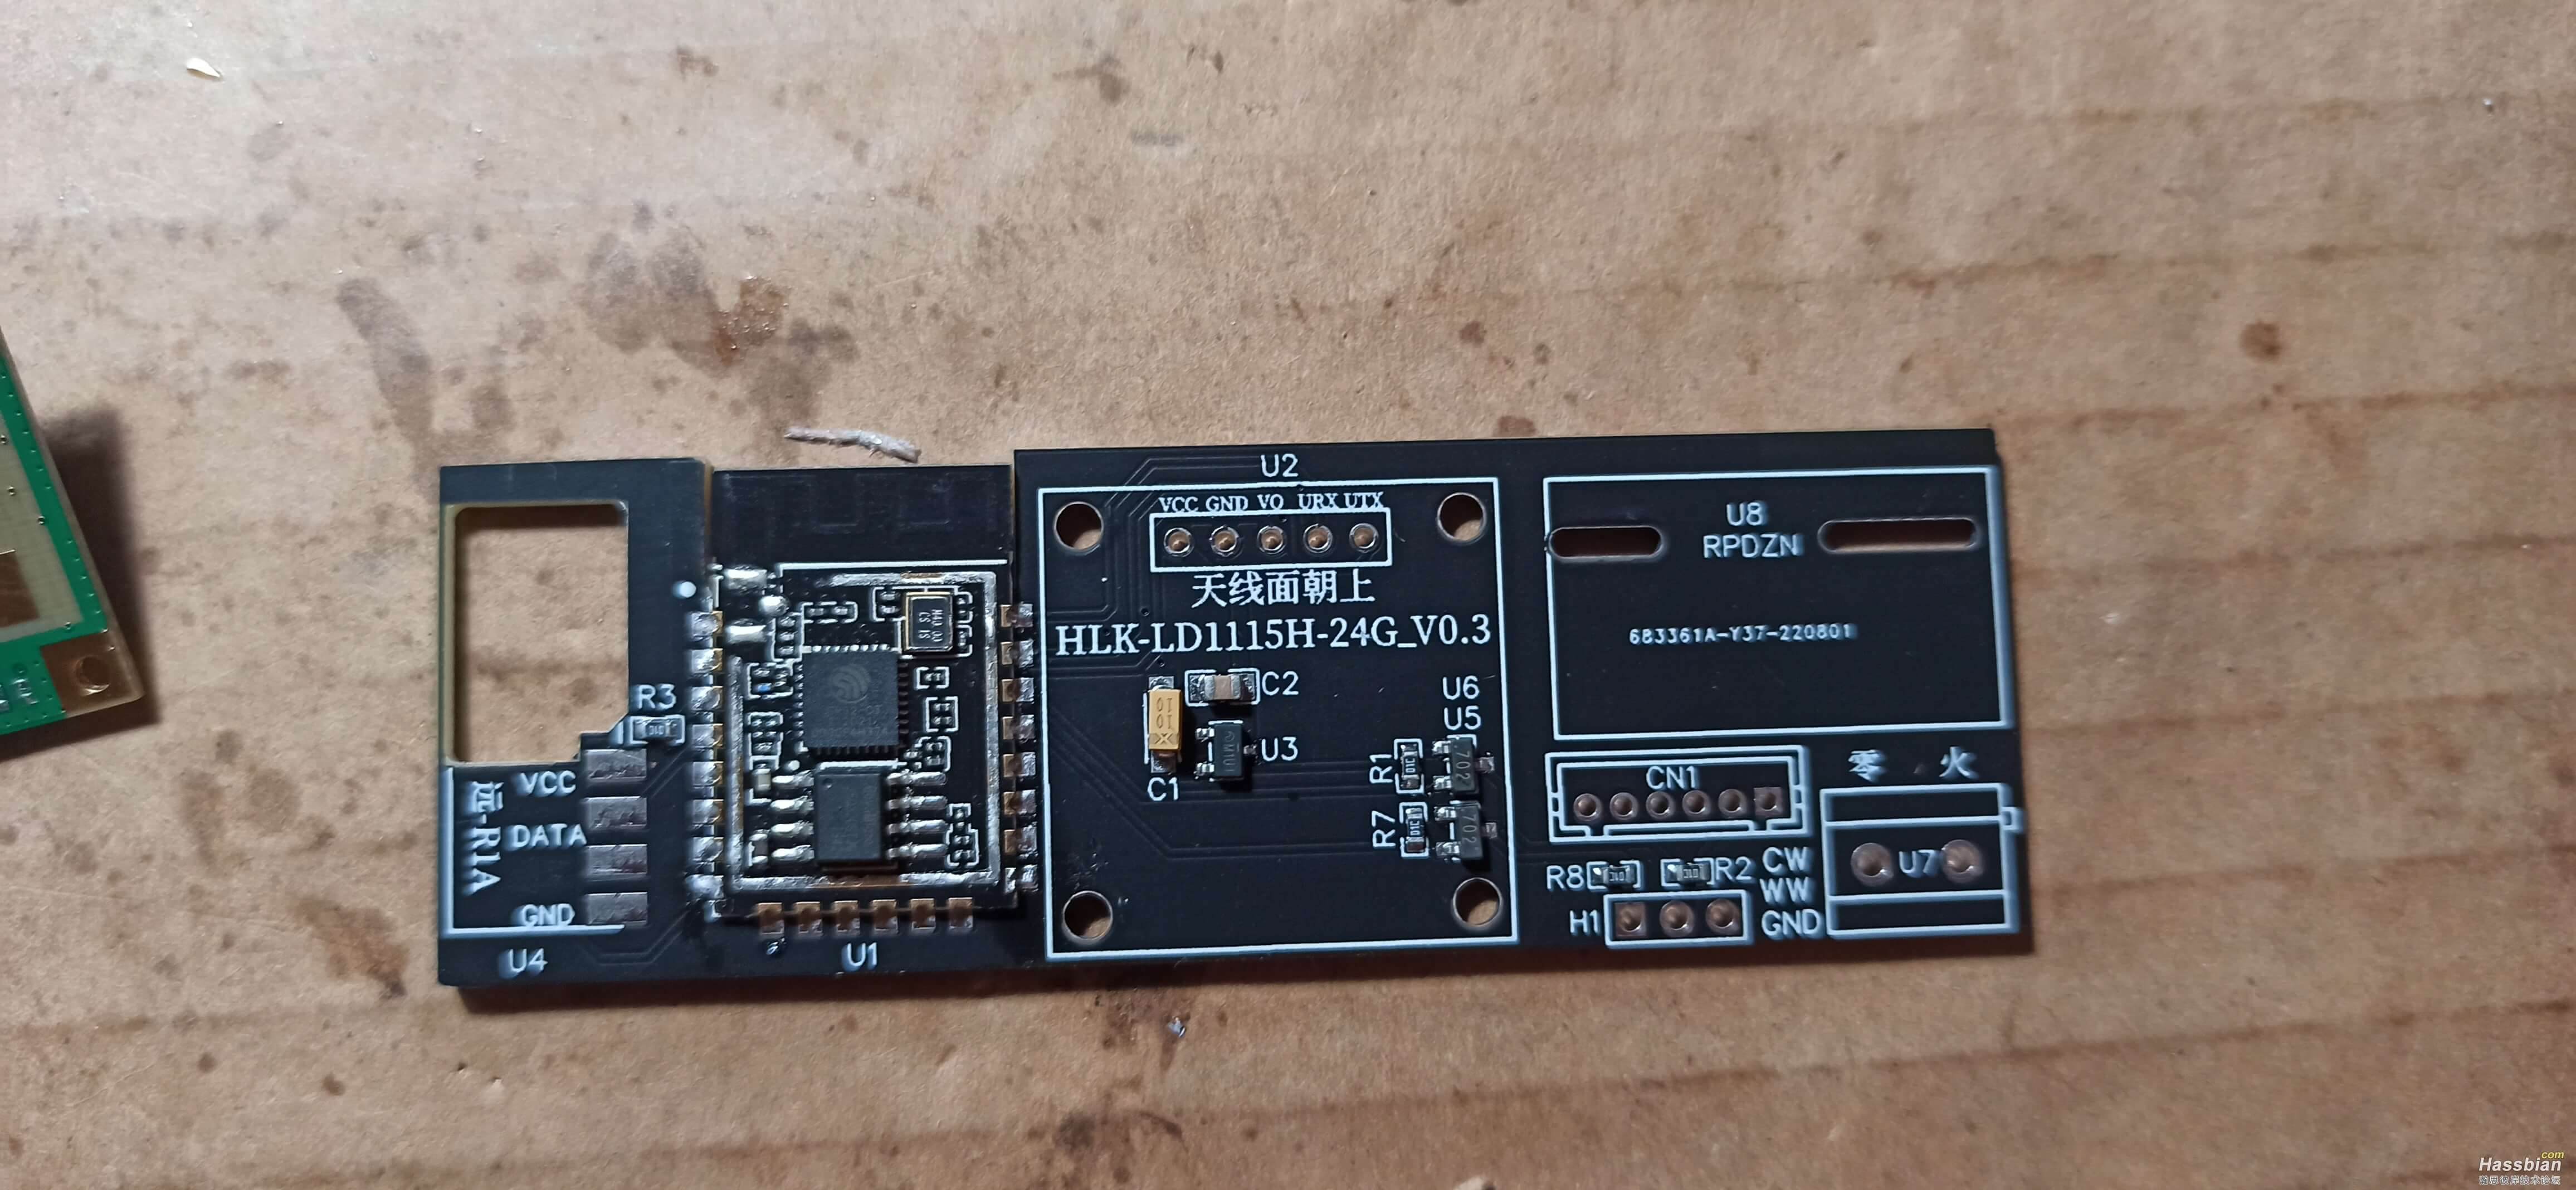 到祸后马上就焊了的电路板(别问我为啥C3开盖了,
因为我买成了2M的版本,开盖是为了换4M的存储)
人体模块就位,在驱动上比划以下
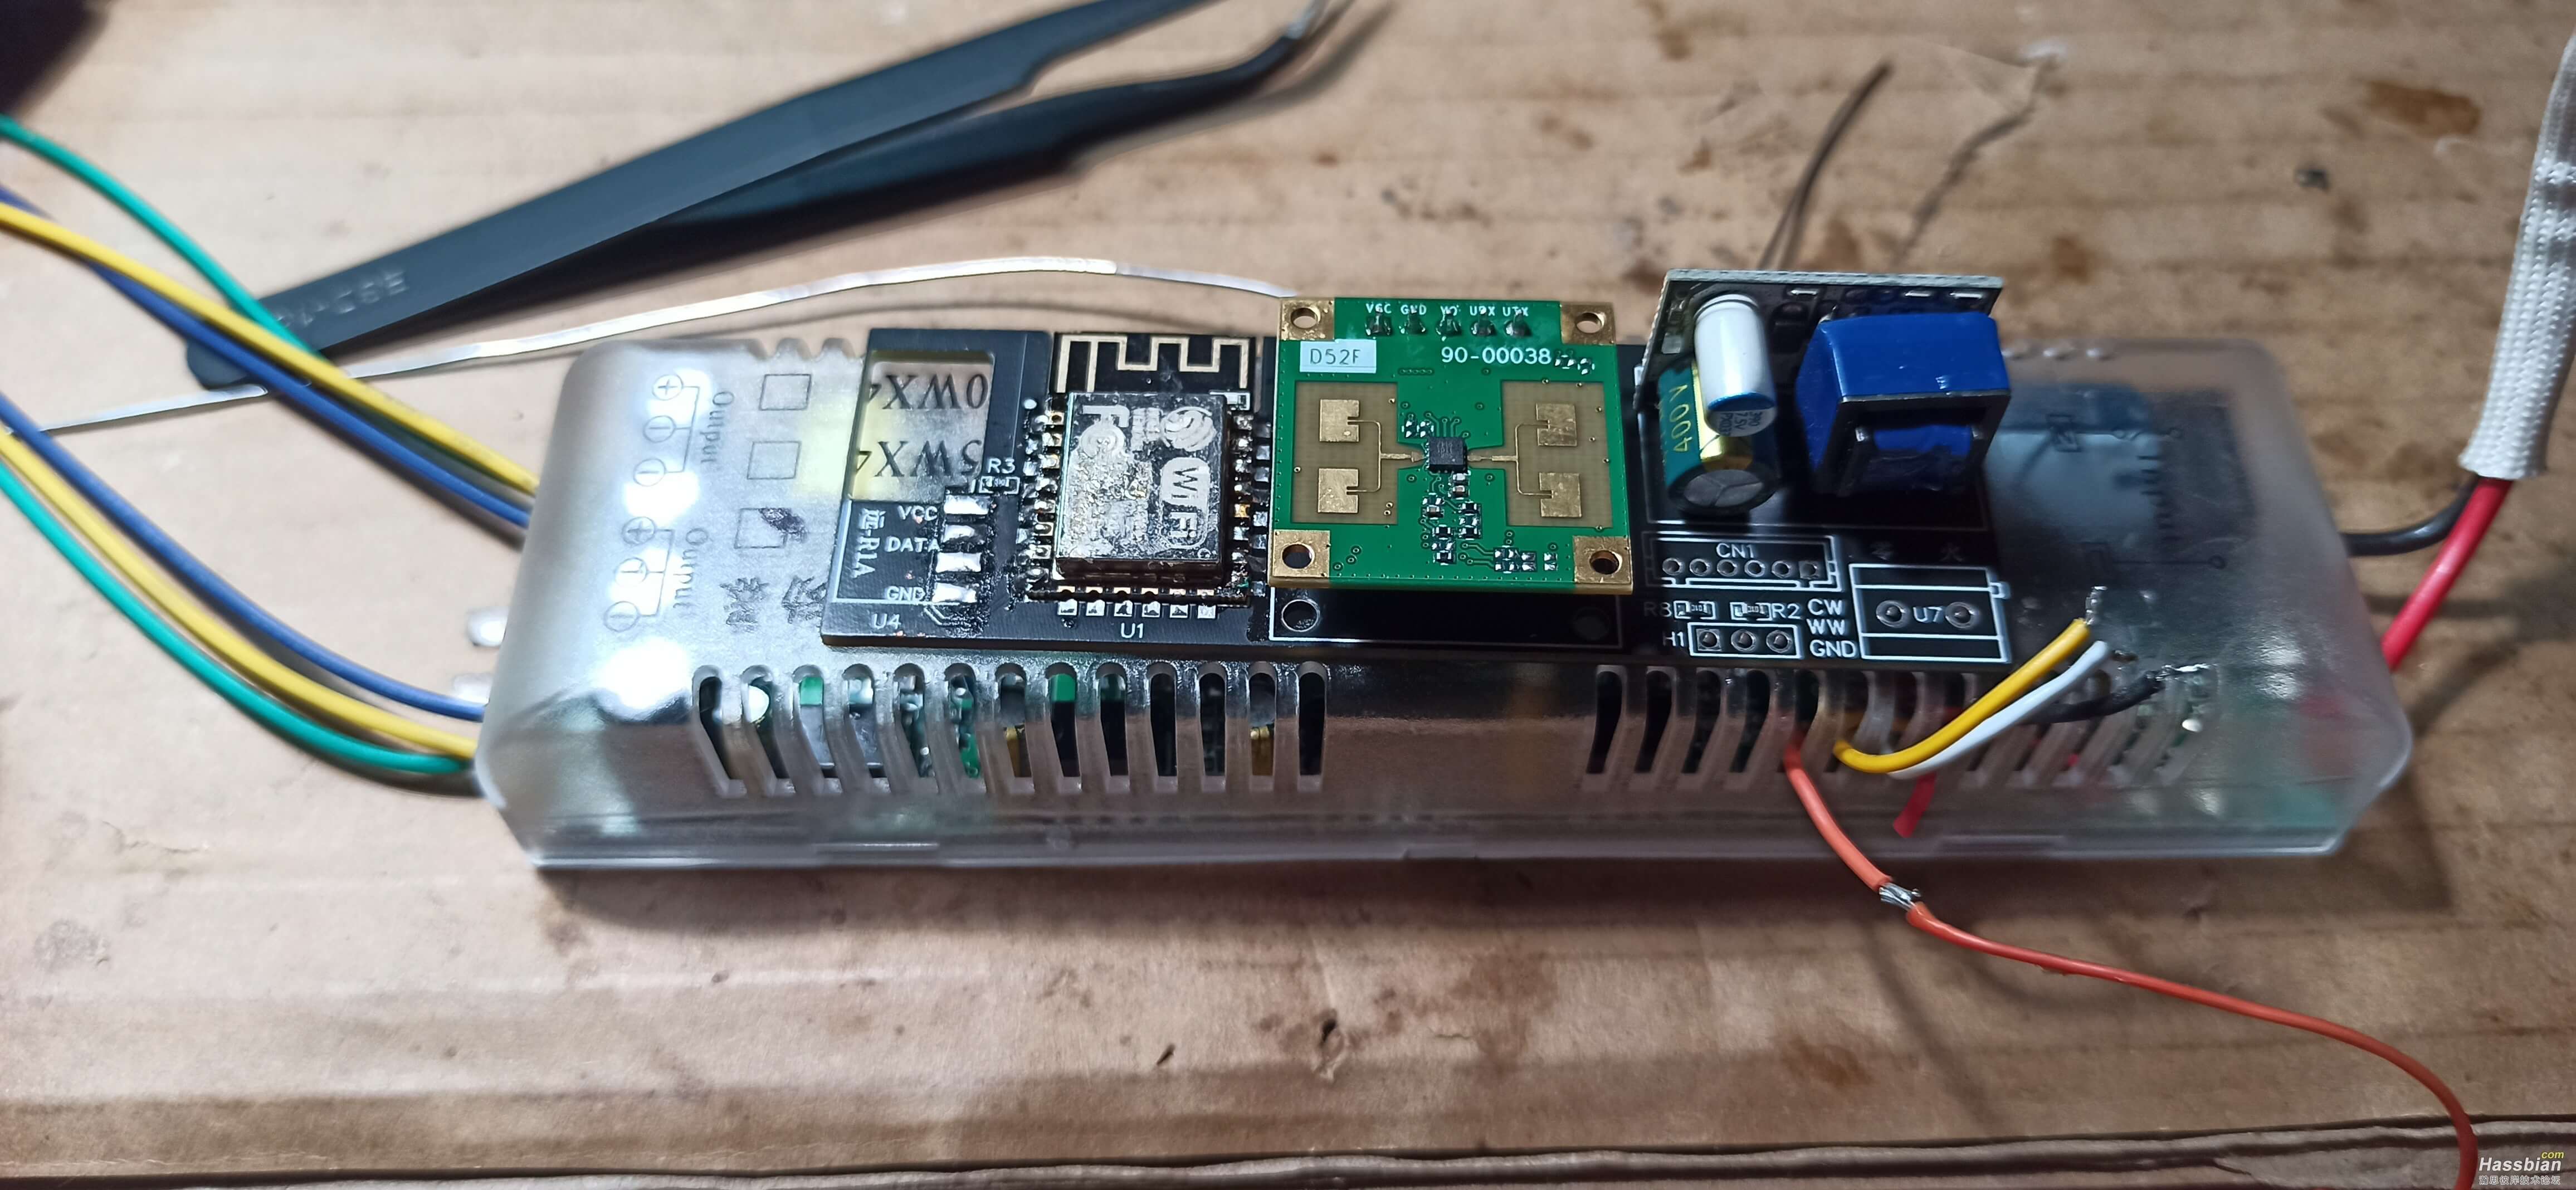
放到驱动上比划以下
把线焊上,扎带伺候
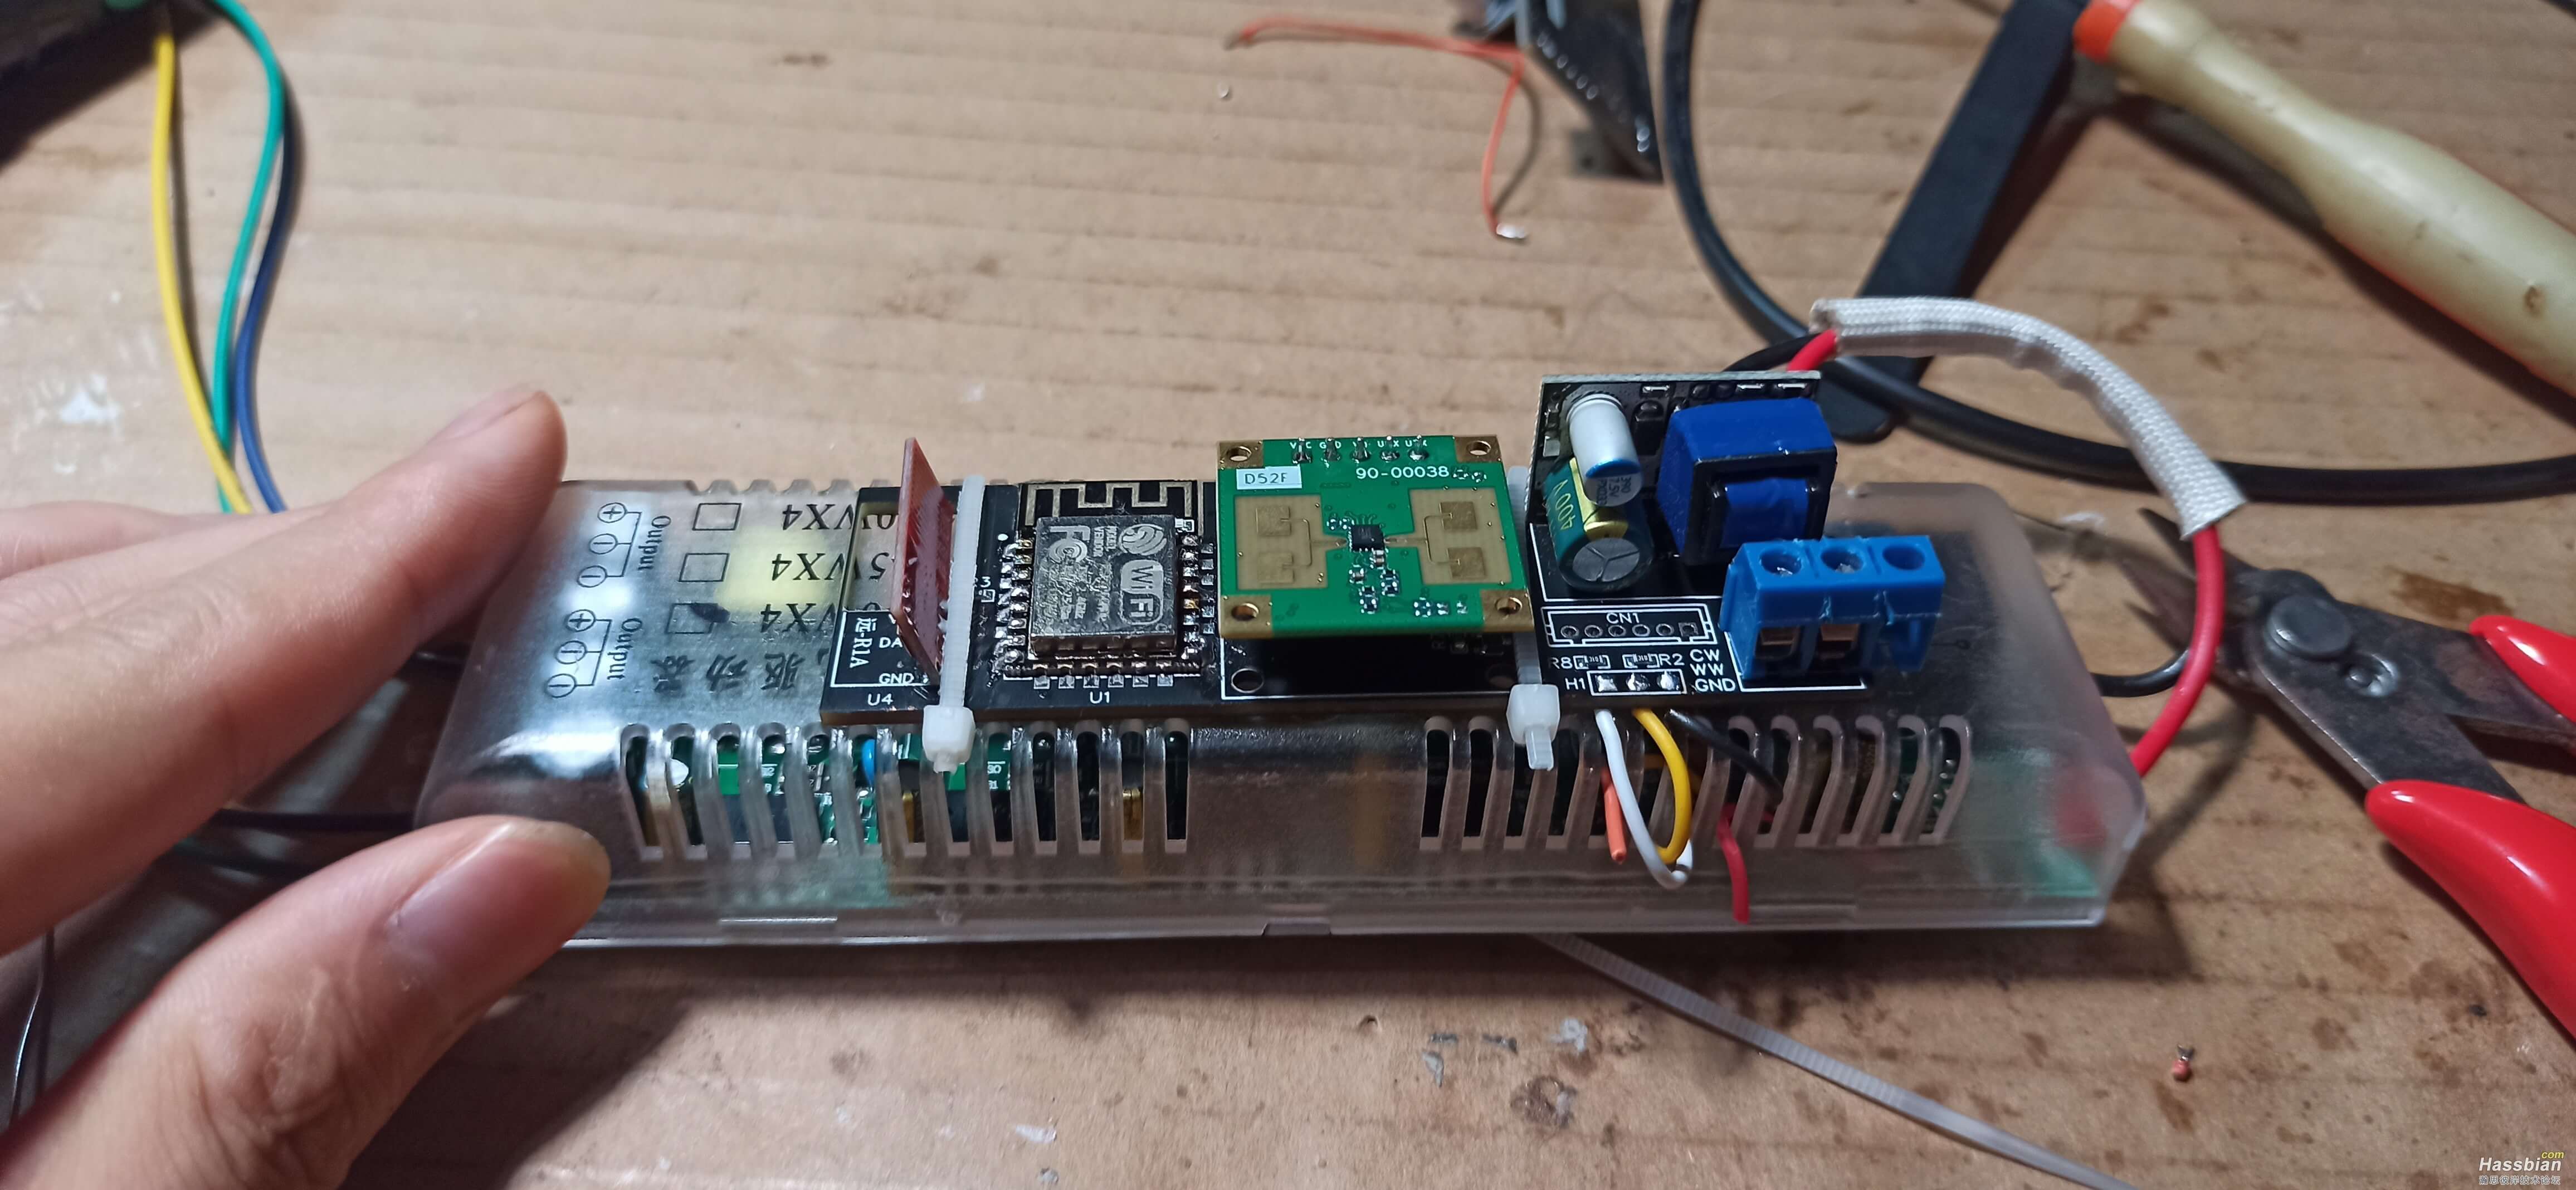
焊上线,咋带捆上
上灯安装,完美
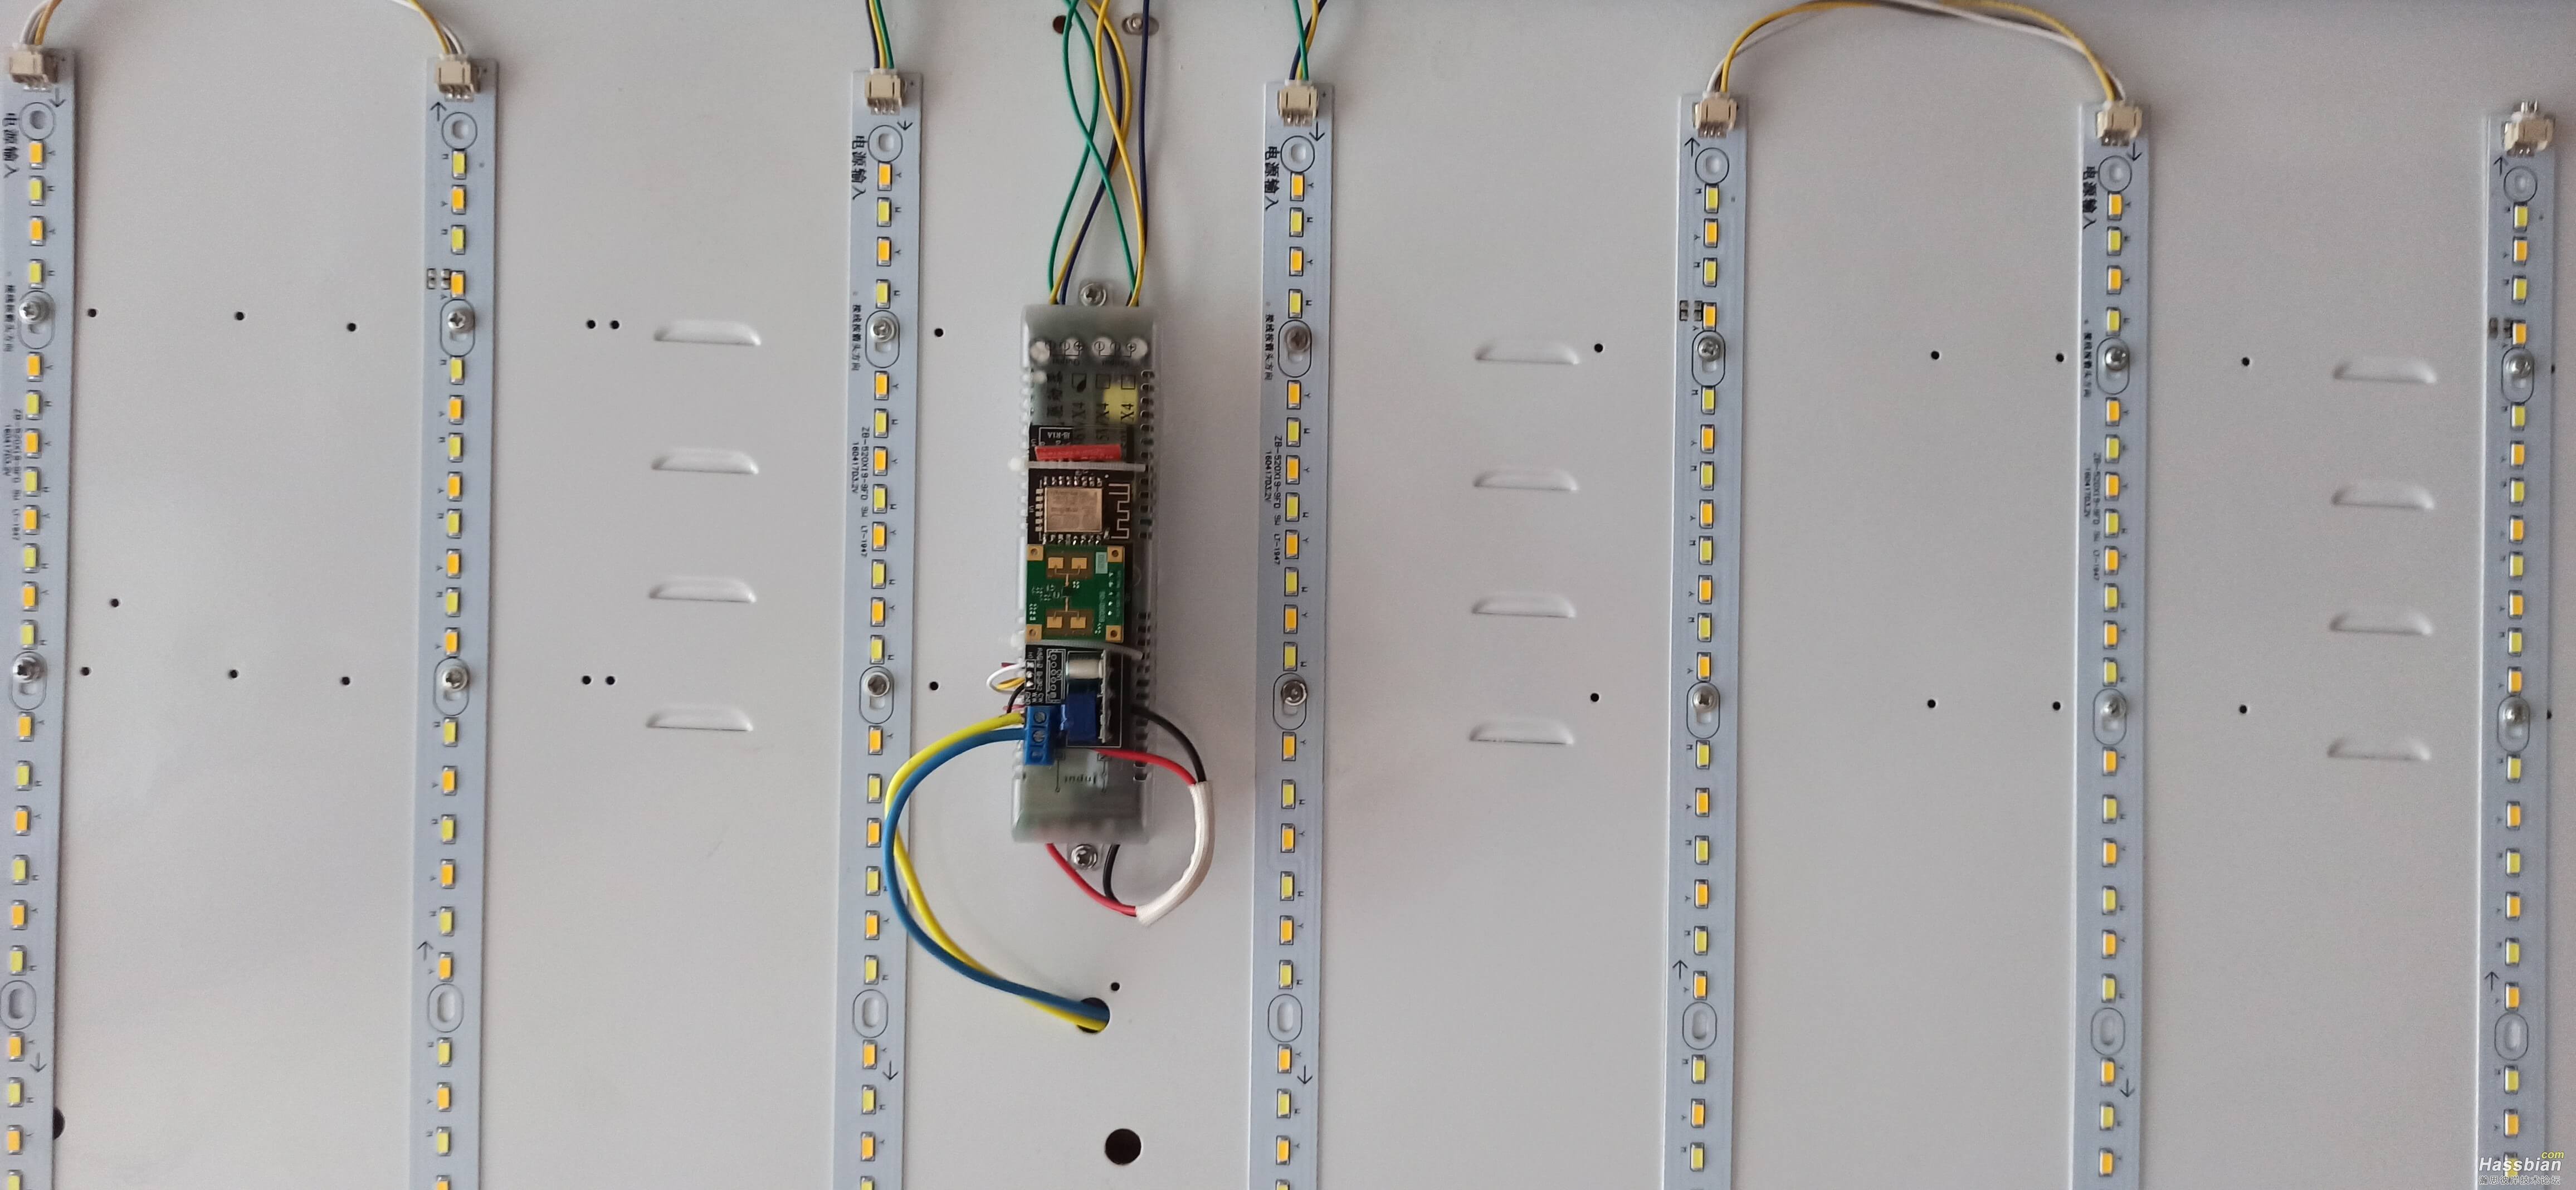
安装回灯上,完美
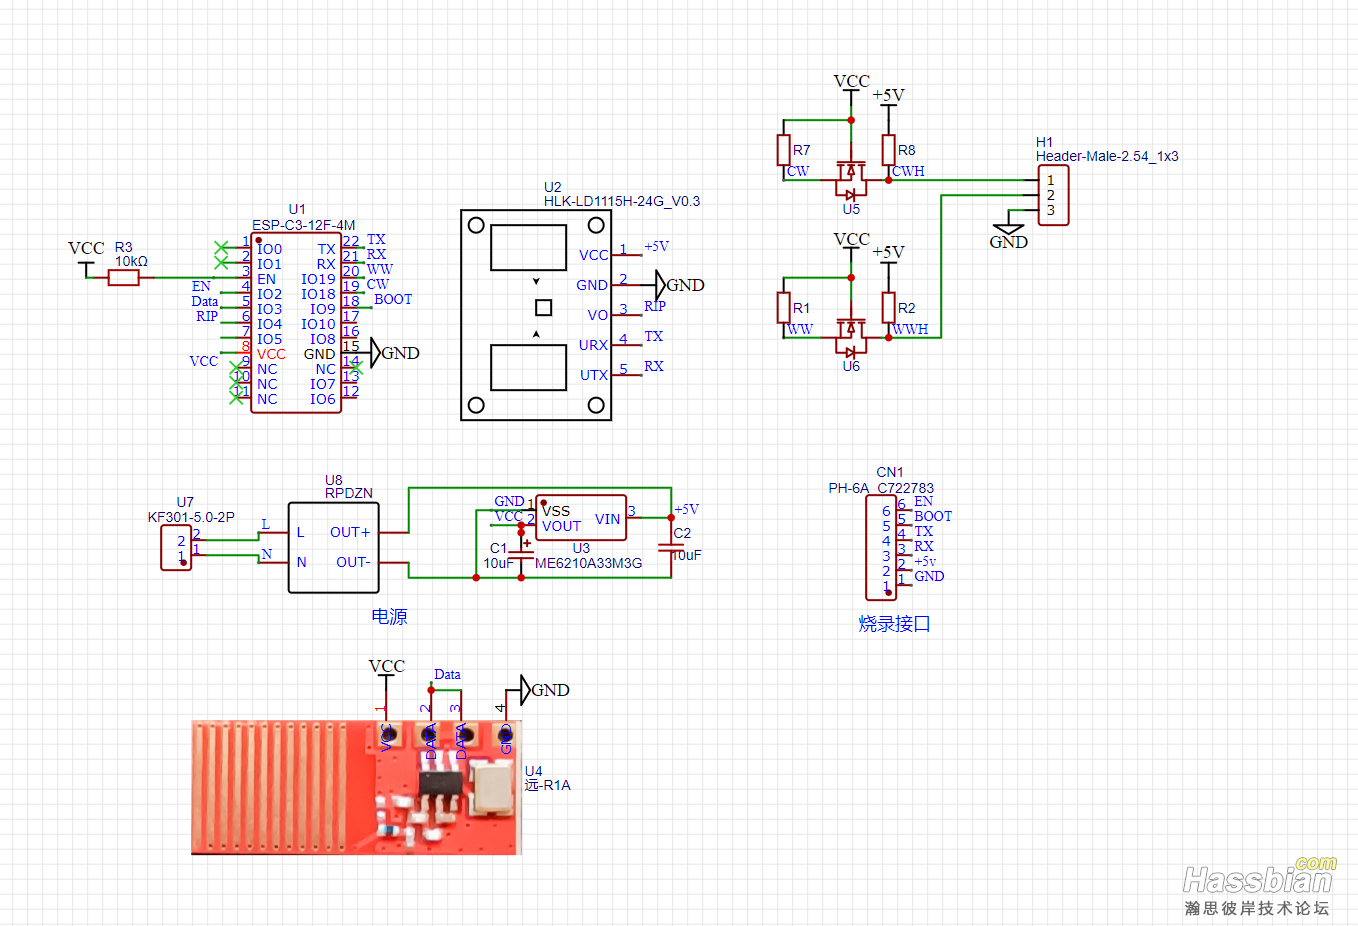
贴一下没啥技术的原理图
|